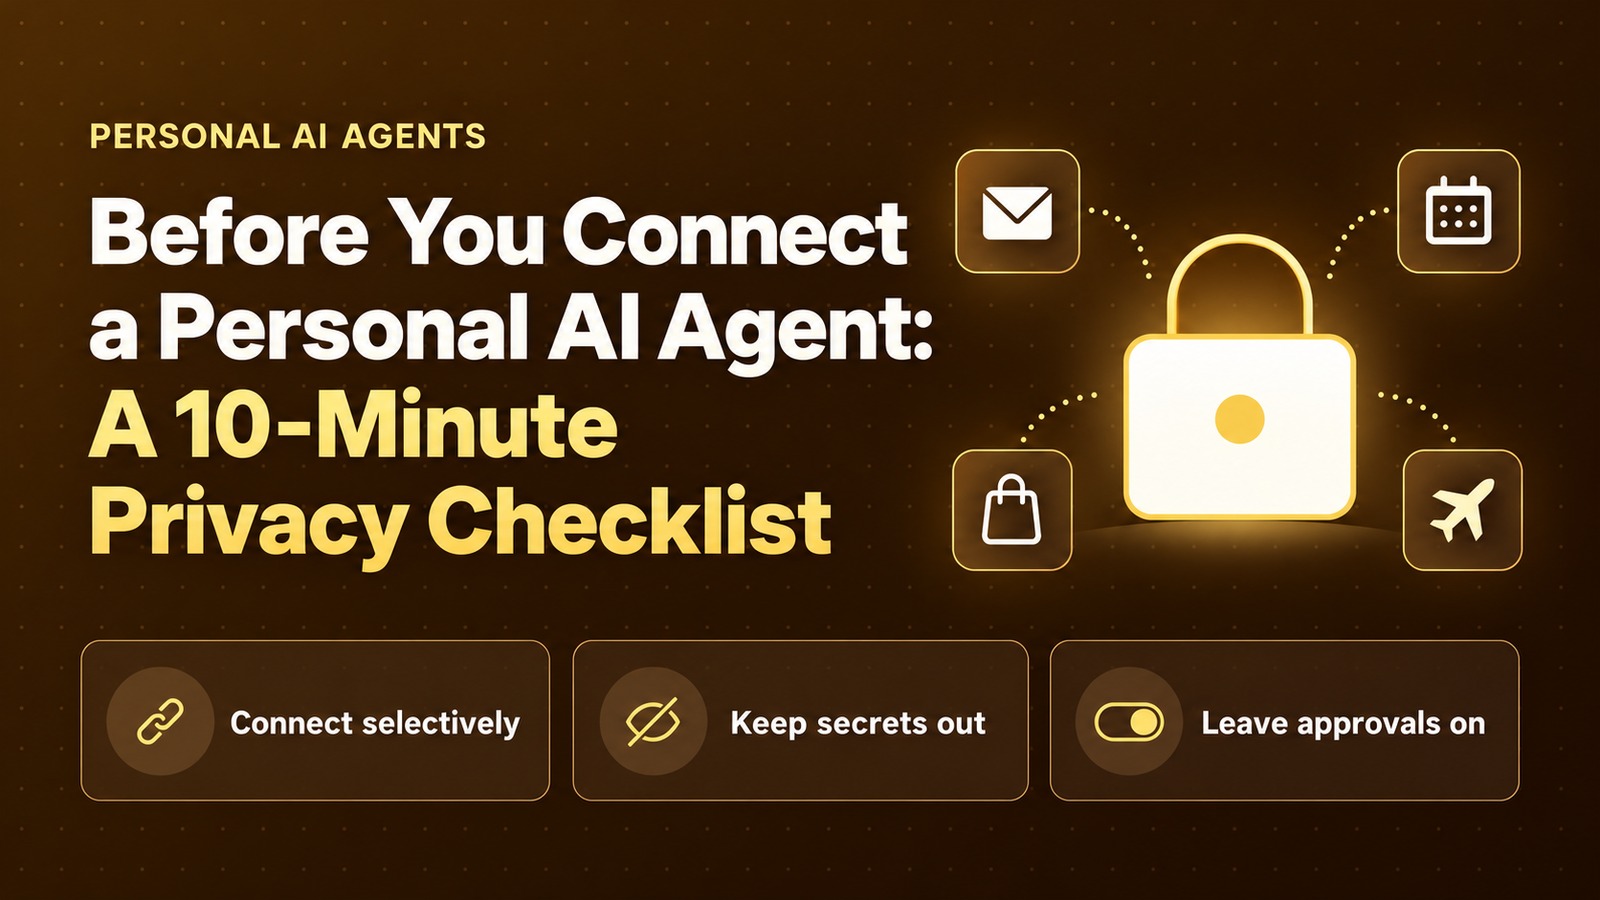
One-Press AI on Your iPhone: Set Up Grok Bot on the Action Button (and What to Connect)
Press and hold one button to talk to your Bot. Setup takes two minutes. Deciding what that Bot can reach deserves a bit longer.
Introduction
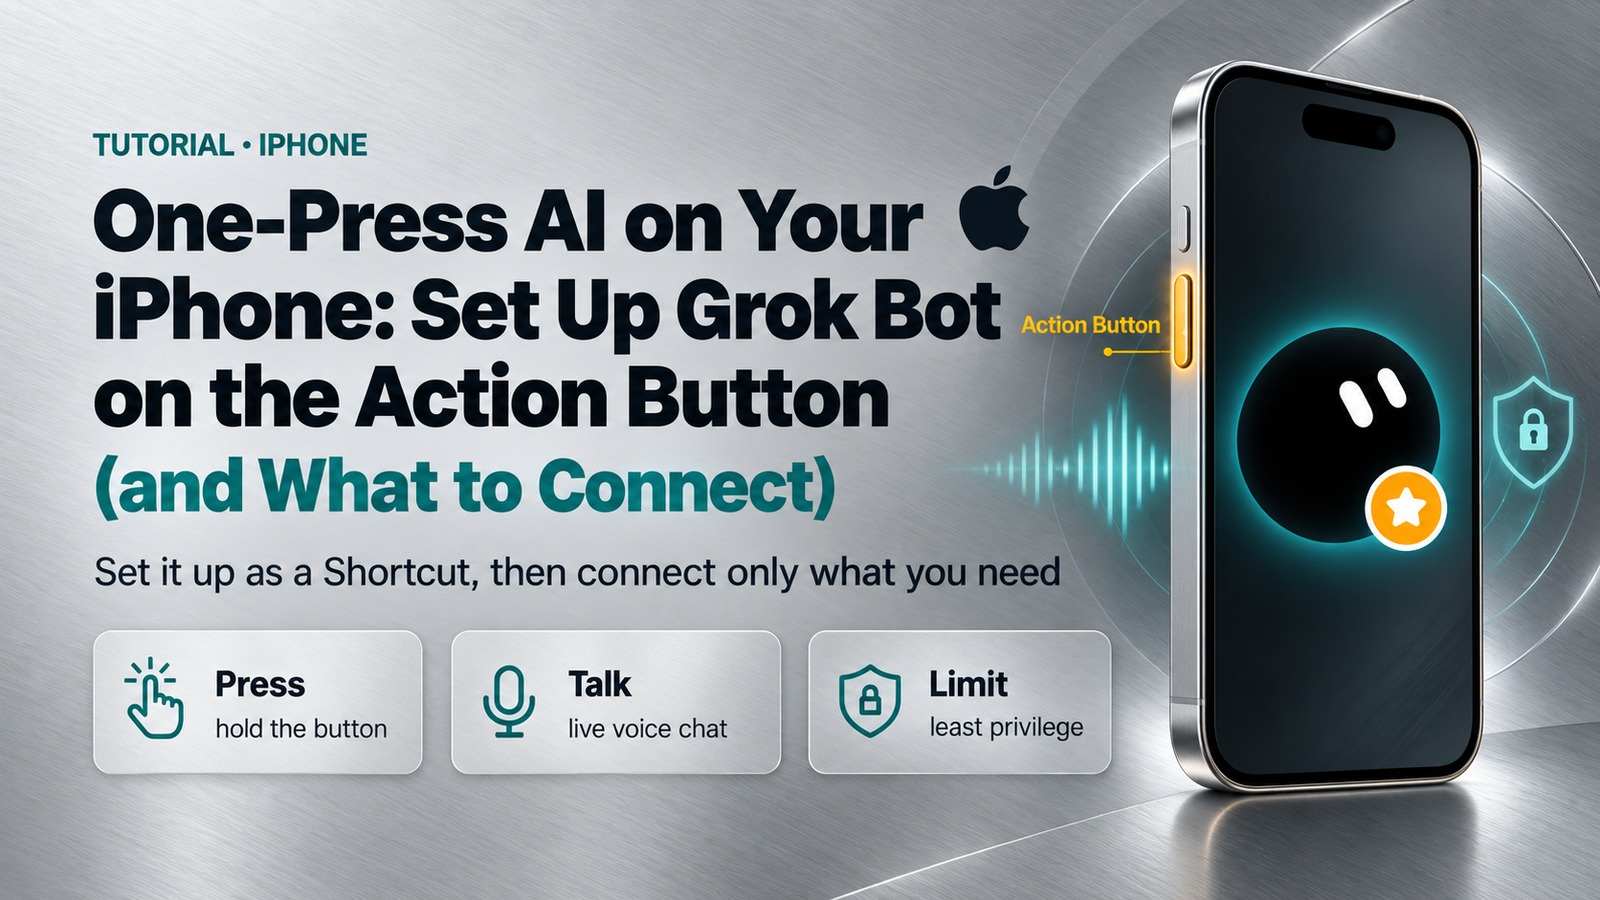
On Oct 19, 2026, the official Grok Bot account posted: “Grok Bot is now one step closer. Set it as your iPhone’s Action Button and press it to talk with Bot” (@bot on X, 18:40 UTC). The short clip shows one press opening a live voice call.
It follows last week’s bigger update (more connectors, X task triggers, faster voice calls). The Action Button isn’t a new capability, just a faster way into the Start voice chat feature the app already had inside a chat (Grok Bot docs).
A faster way in also means faster access to everything your Bot can touch, so we cover setup first, then what to connect.
Before you start
- Phone: an iPhone with an Action Button (iPhone 15 Pro and later Pro models, and newer lines). Check Apple’s Action button guide for your model.
- Software: the Grok Bot app on iOS 18 or later (App Store).
- Plan: an eligible paid plan. See the official plan list below.
- Time: about 2 minutes for setup, and 10 more for the permissions review.
One press reaches every app your account has connected.
Set it up in two minutes. Review what it can touch in ten.
1. Requirements
- Hardware. Apple says: “On supported models, iPhone has an Action button in place of the Ring/Silent switch.” It began with iPhone 15 Pro and 15 Pro Max; check Apple’s page for newer models.
- Software. The App Store listing says “Requires iOS 18.0 or later.” No minimum app version for the Action Button is published, so update to the latest.
- Plan. Access comes with an eligible paid plan. The official lists include paid individual Cursor plans or Cursor Teams, a linked SuperGrok, SuperGrok Plus or SuperGrok Heavy subscription, and certain X subscription tiers (Grok Bot for Mobile, Cursor help). If your account already includes Grok Bot, don’t buy it again through Apple.
2. Set It Up
Step 1: Get the app working first
- Install Grok Bot from the App Store and update it.
- Open it and choose Log In or Sign Up, then finish signing in in the browser. If your access comes from SuperGrok, choose Link Grok Account, then Finished Linking? Refresh My Status (docs).
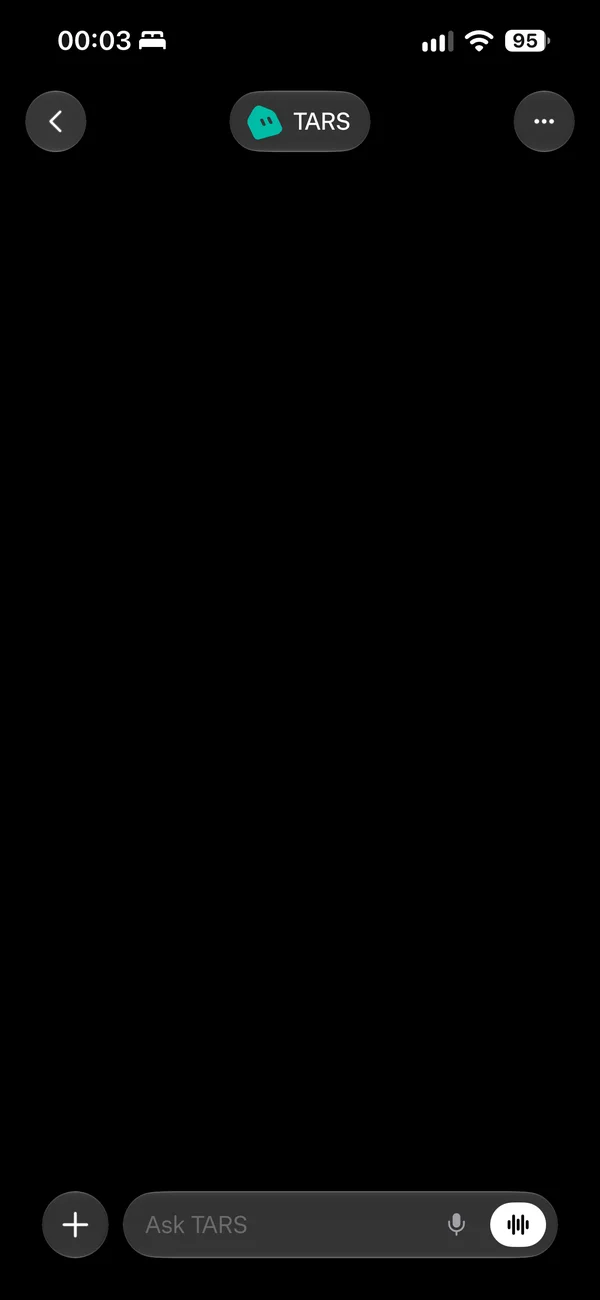
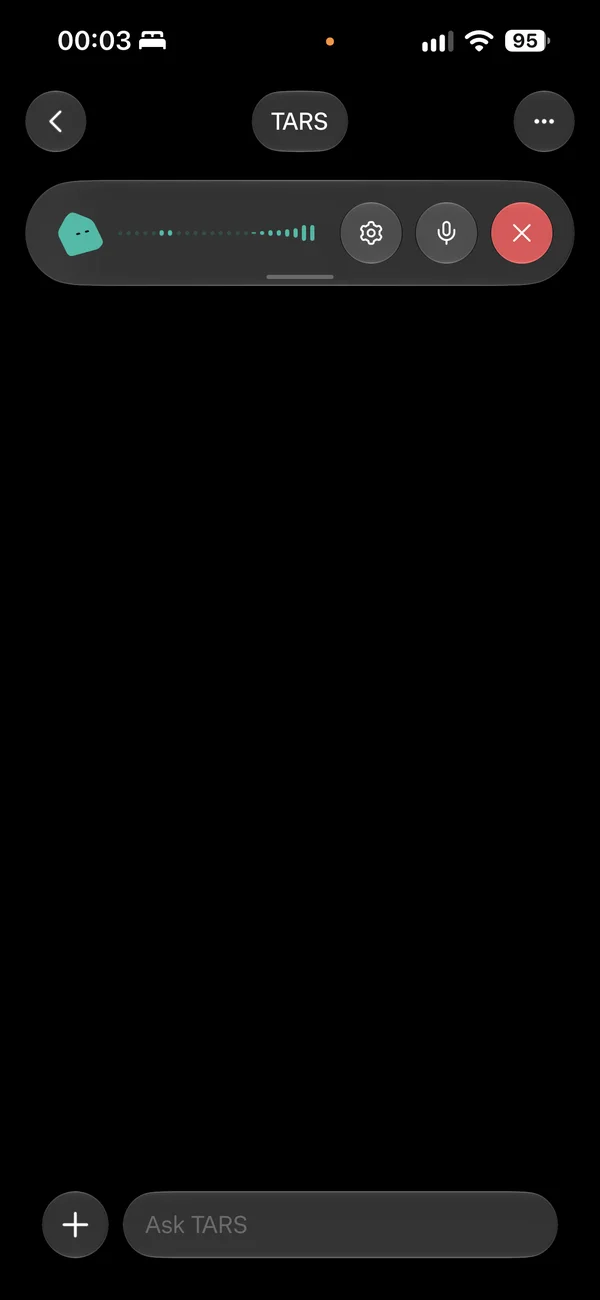
- Open a Bot’s chat and tap the waveform button to the right of the input to Start voice chat. On first use, iOS should ask for microphone access; allow it, or your first button press may stop at that dialog. (We didn’t capture the prompt.)
- A voice bar appears at the top. The mic icon mutes you, and the red X ends the call.
Step 2: Assign it to the Action Button as a Shortcut
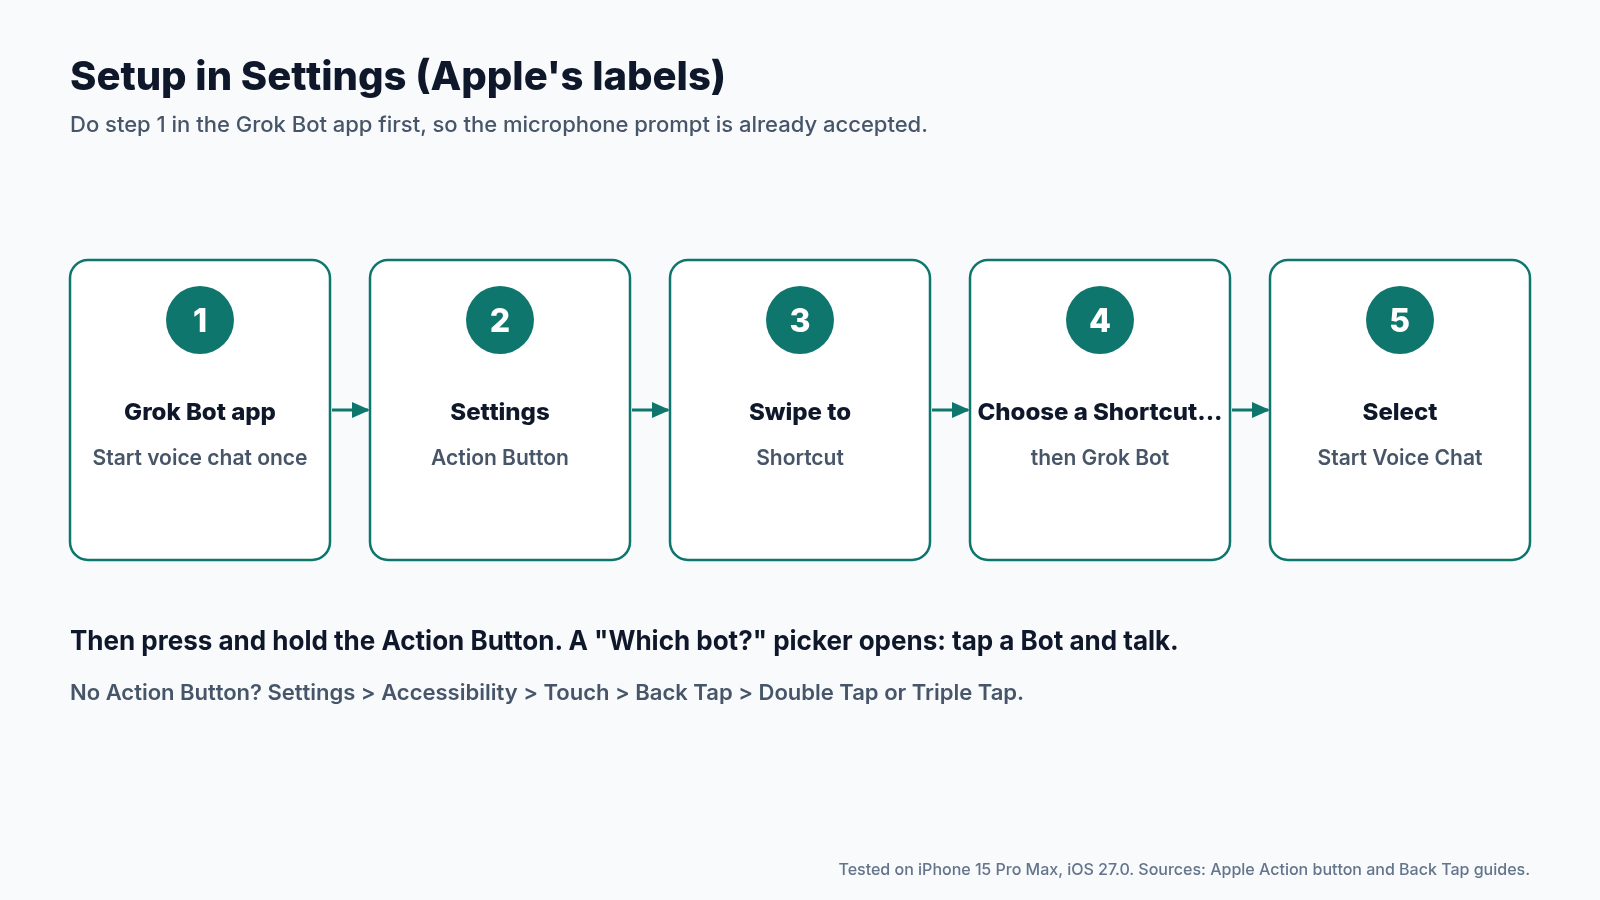
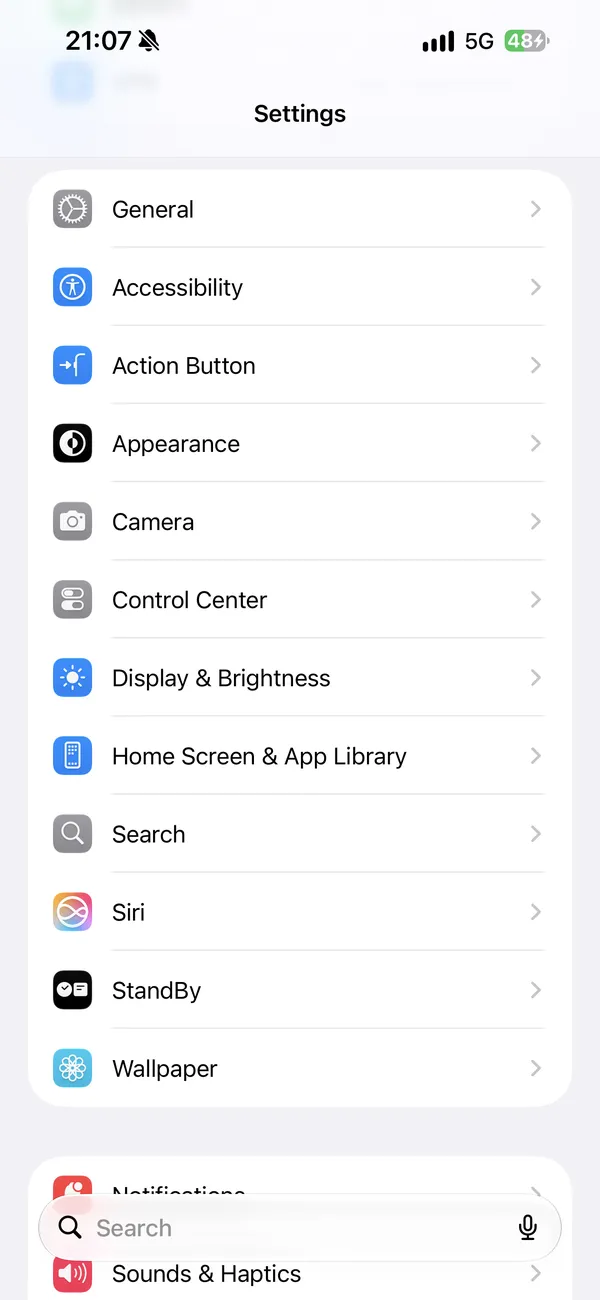
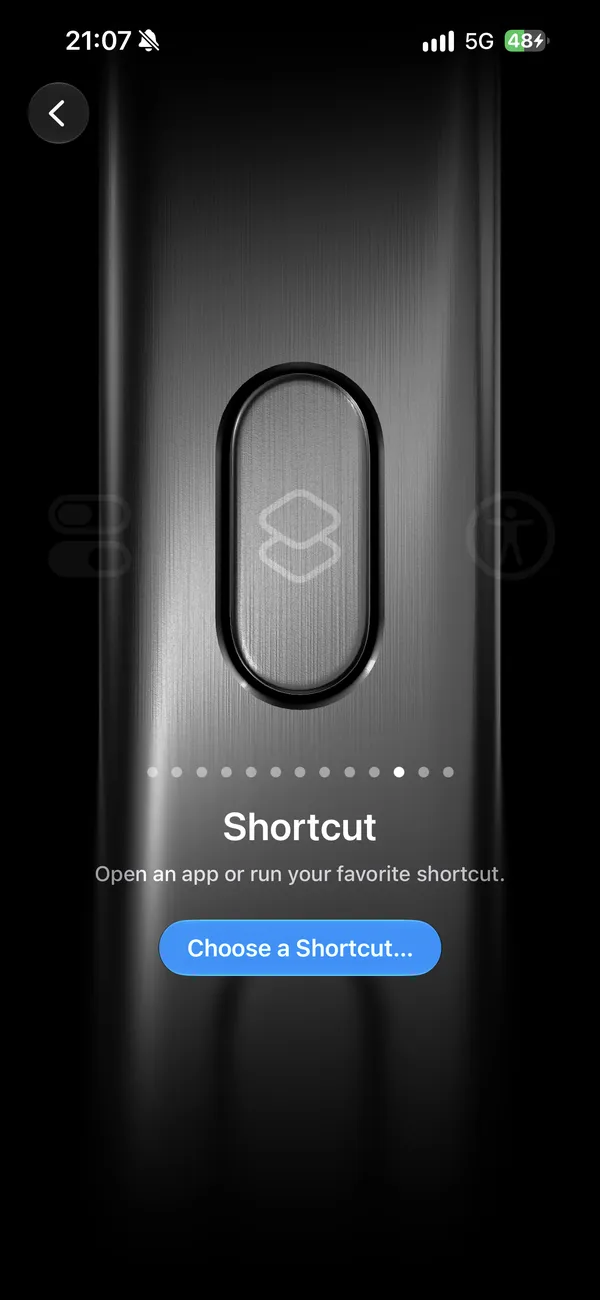
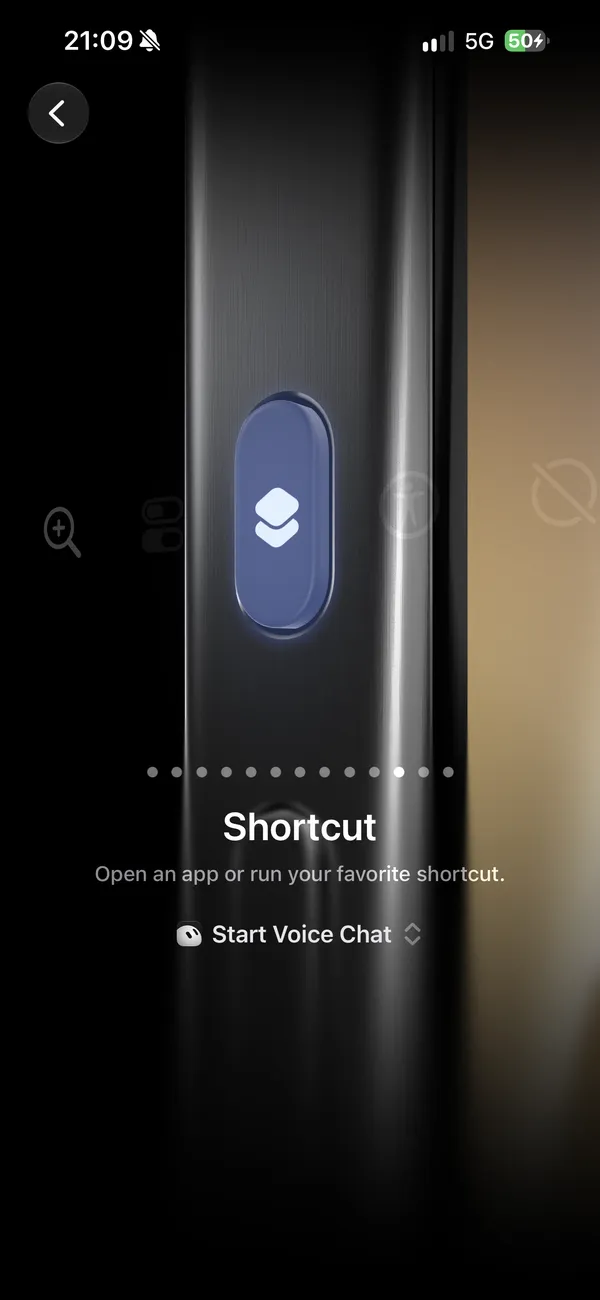
Tested on an iPhone 15 Pro Max running iOS 27.0. The exact path is Settings → Action Button → swipe to Shortcut → Choose a Shortcut… → Grok Bot → Start Voice Chat.
- Open the Settings app and tap Action Button.
- Swipe through the actions to Shortcut. Apple warns that for Controls, Shortcut and Accessibility, “you need to tap the button below the action and select a specific option—otherwise the Action button does nothing” (Apple).
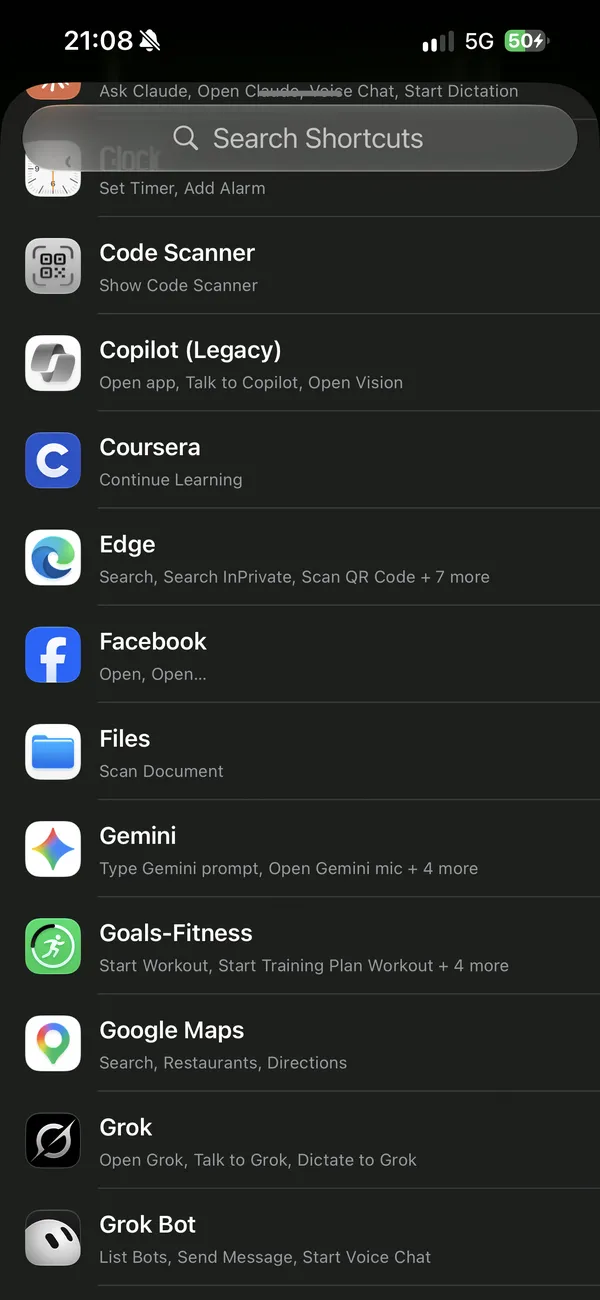
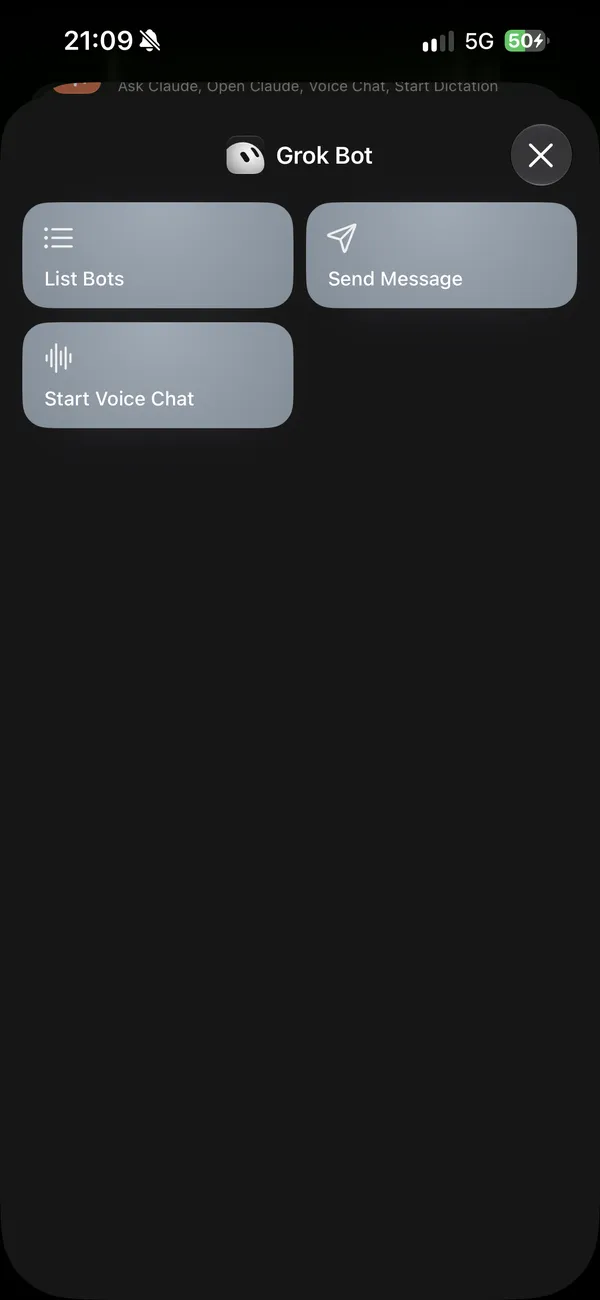
- Tap Choose a Shortcut…, scroll to Grok Bot and tap it.
- Select Start Voice Chat. The Action Button page now shows “Start Voice Chat” under Shortcut.
Use Shortcut, not Controls. No Grok Bot Control is documented for Control Center or the Lock Screen, despite some coverage suggesting one.
Step 3: Press and talk
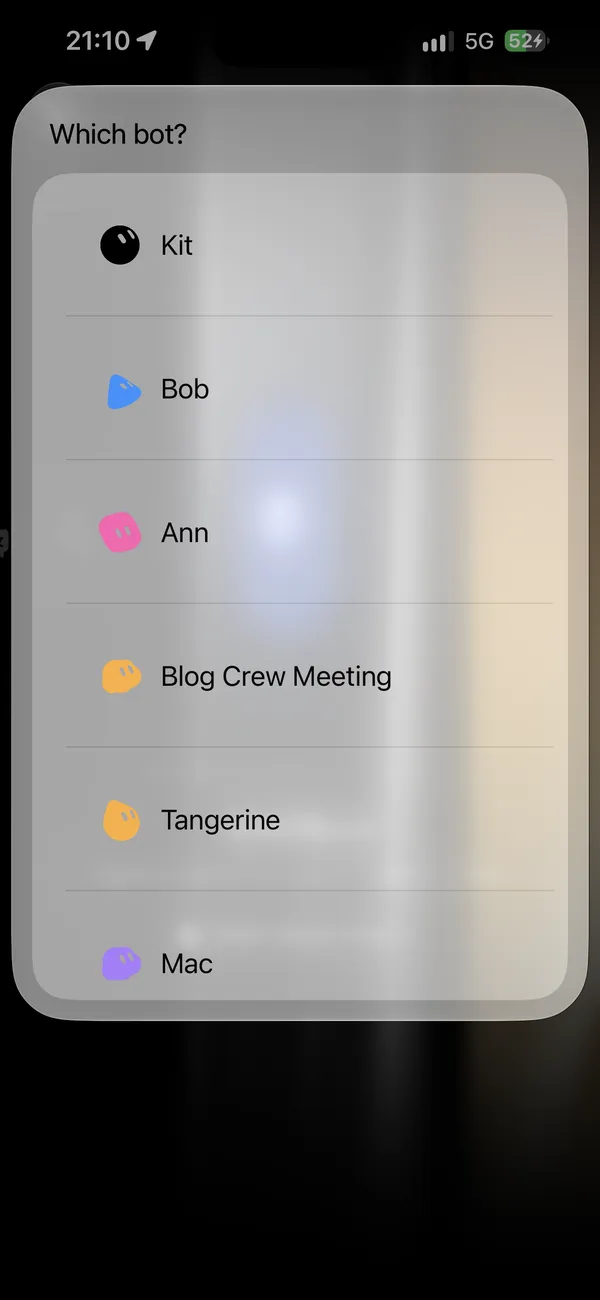
Press and hold the Action Button. In our test, a Which bot? picker came up first, listing every Bot on the account. Tap the one you want, and the call starts with a “Calling…” banner at the top of the screen. The call stays in the Dynamic Island, and afterward the conversation can show a Voice chat card (docs).
The picker is a useful safety step, but every Bot shares the same connected apps (section 3).
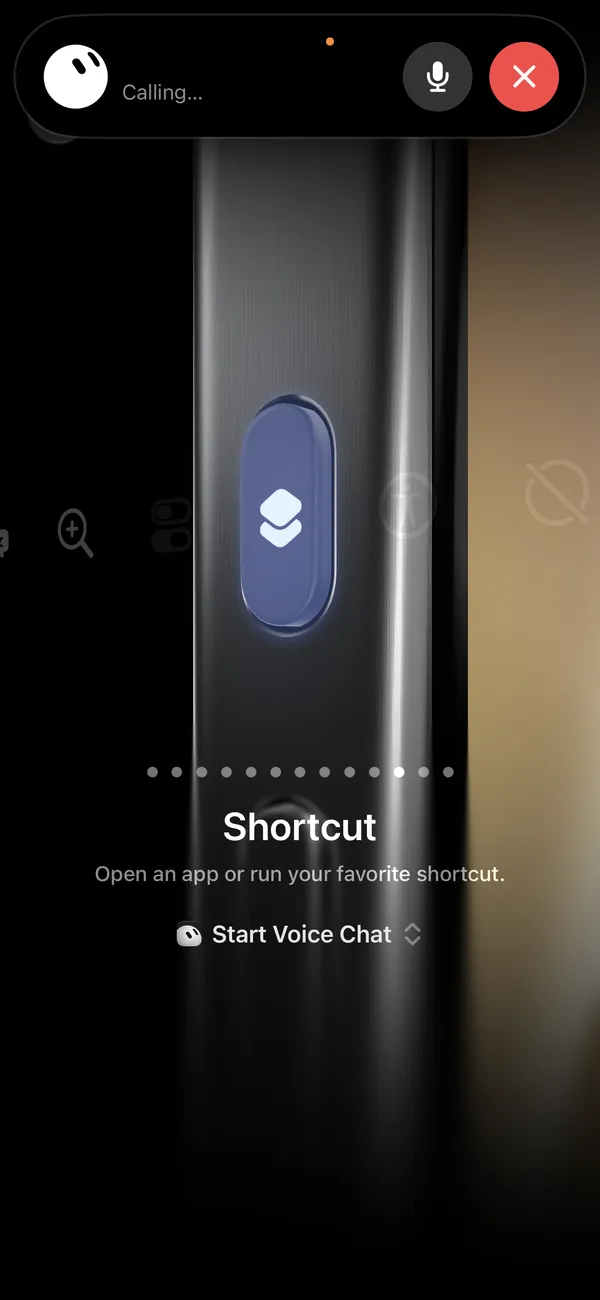
Update (31 October 2026): Grok Bot’s mobile docs now cover the Action Button. They add that you can pick a Bot in the shortcut to skip the Which bot? picker, and that pressing the button again during a call hangs up.
No Action Button? Use Back Tap
On iPhones without the button, Apple’s Back Tap does the same job (Apple). Back Tap runs Shortcuts, so first make a small one that opens Grok Bot.
First, create the shortcut:
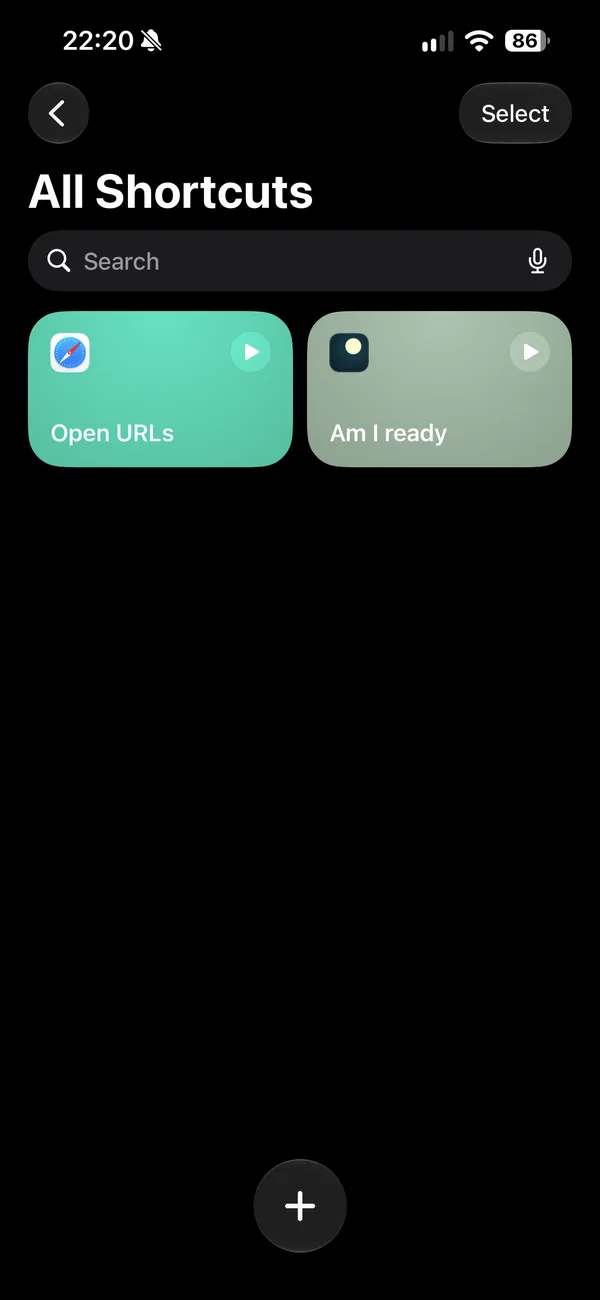
- Open the Shortcuts app, go to All Shortcuts, and tap +.
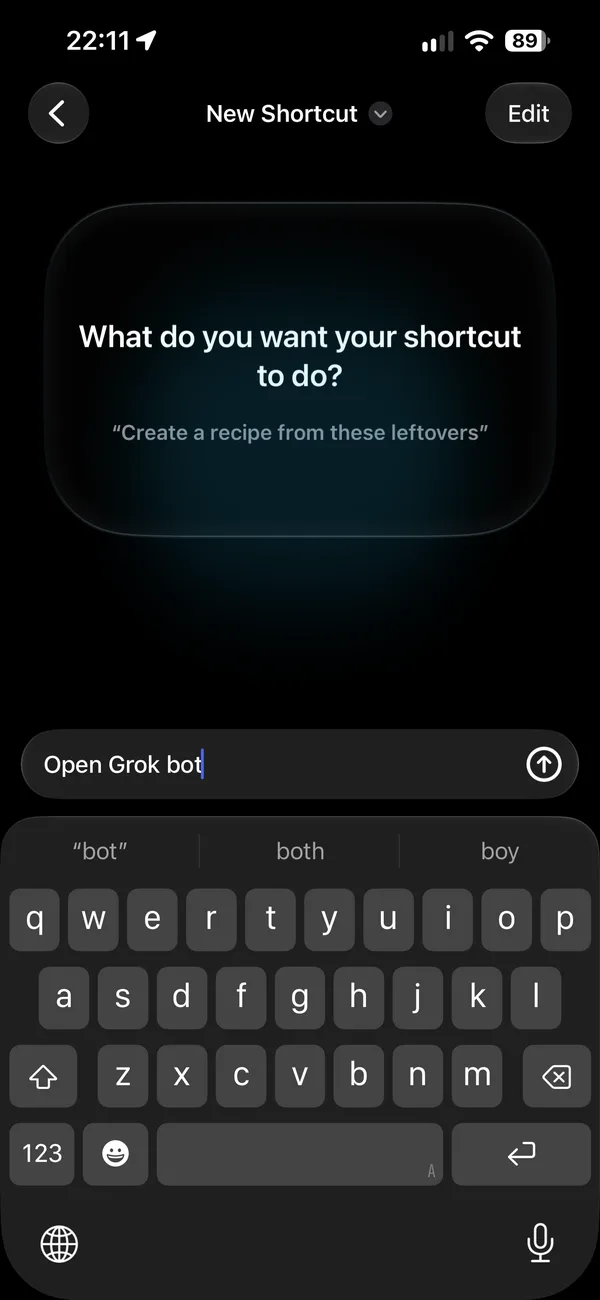
- In the What do you want your shortcut to do? box, type Open Grok bot and send it. Shortcuts shows “Looking into it…” for a moment.
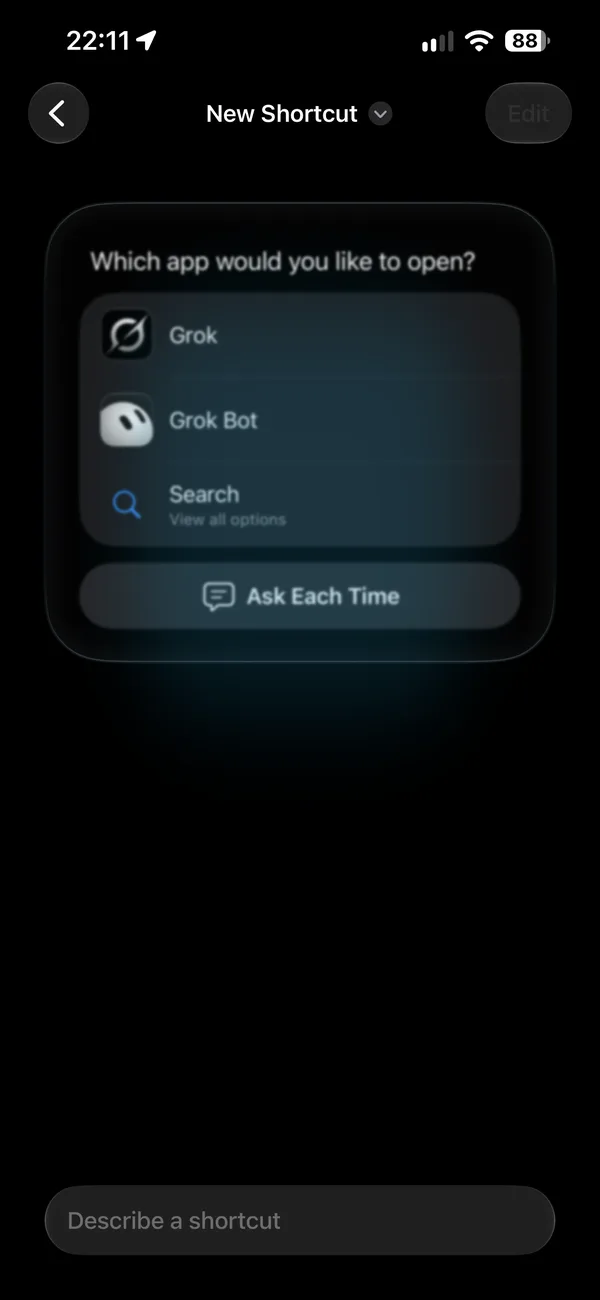
- Under Which app would you like to open?, pick Grok Bot. The separate Grok app is listed too, so don’t mix them up.
- You get a card named Open Grok Bot, “Opens the Grok Bot app”. That’s the finished shortcut.
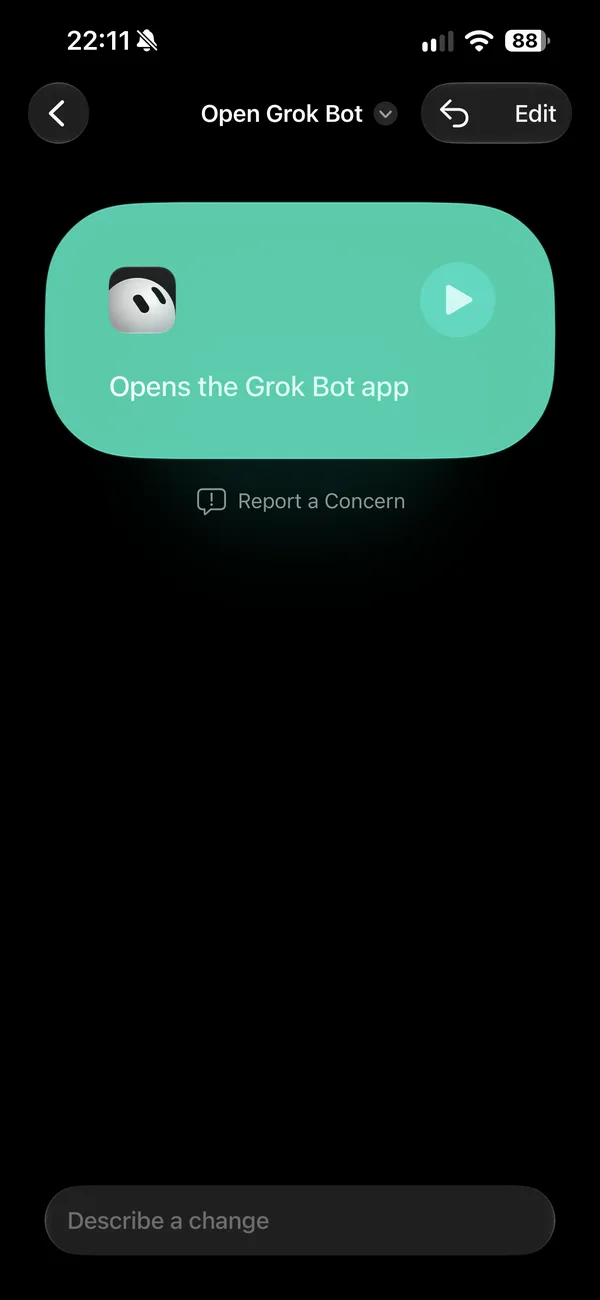
Then assign it to Back Tap:
- Go to Settings → Accessibility → Touch → Back Tap.
- Tap Triple Tap (or Double Tap), then open Shortcuts in the action list.
- Check Open Grok Bot. Back on the Back Tap screen, Triple Tap now reads Open Grok Bot. To turn it off later, choose None.
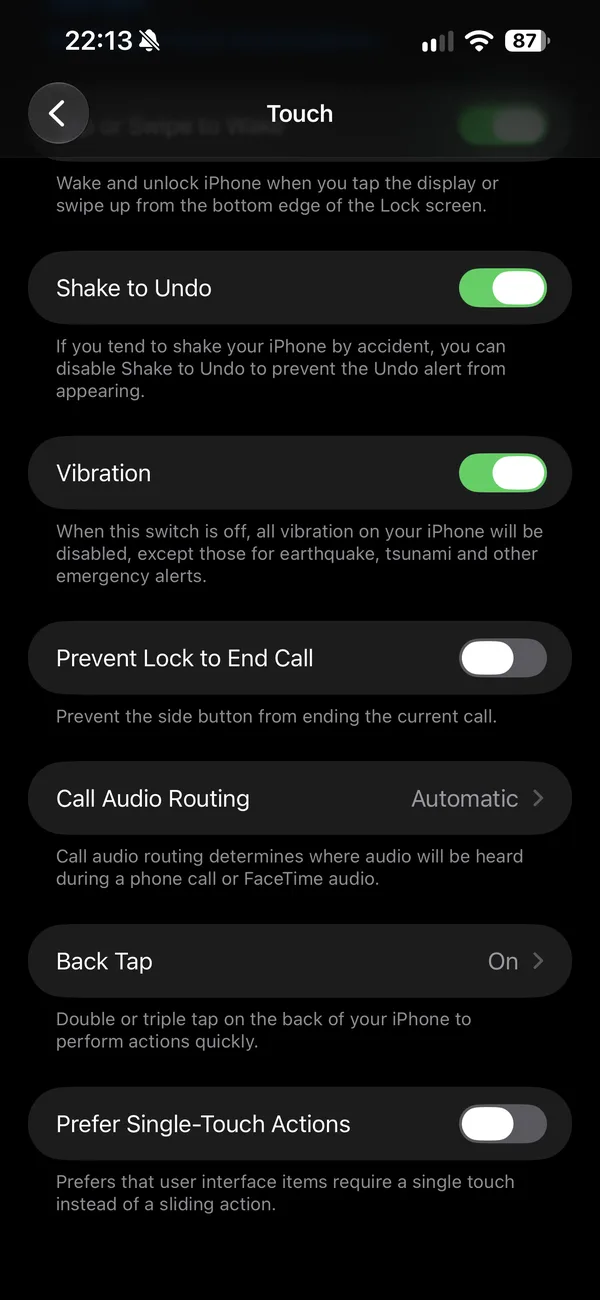
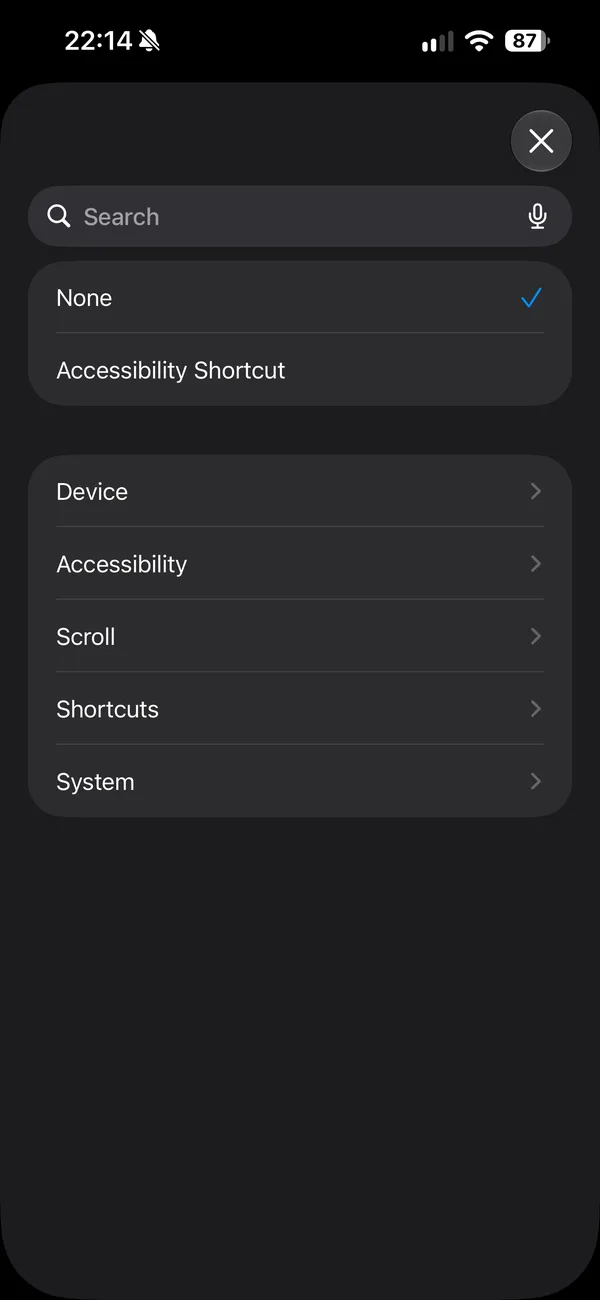
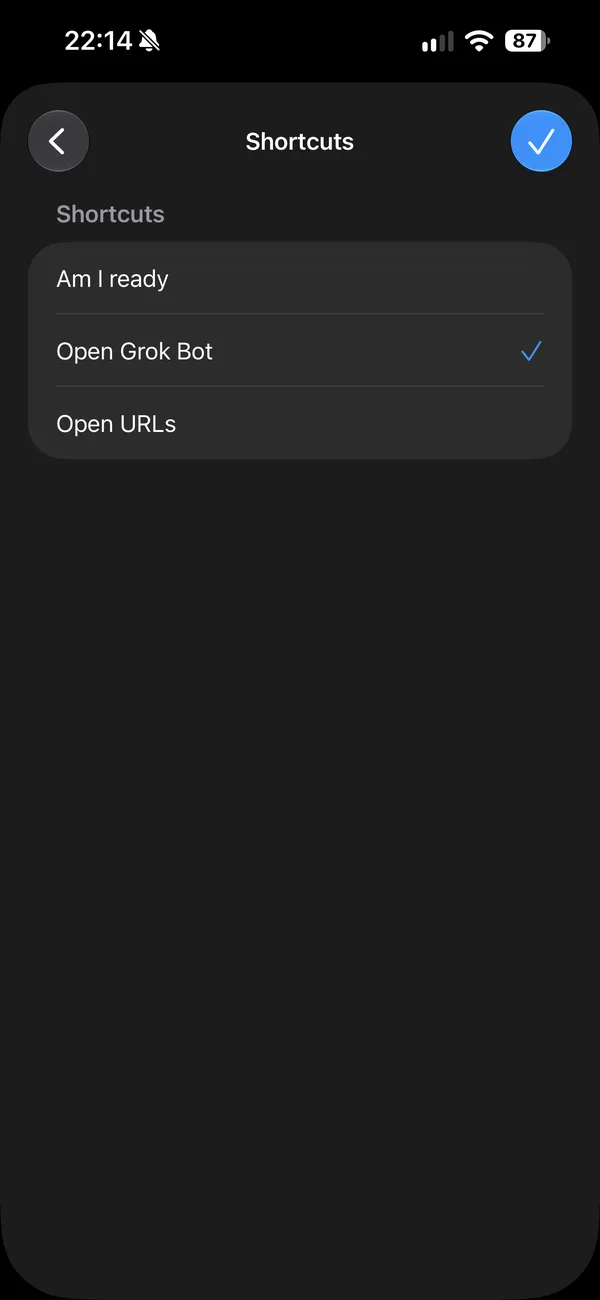
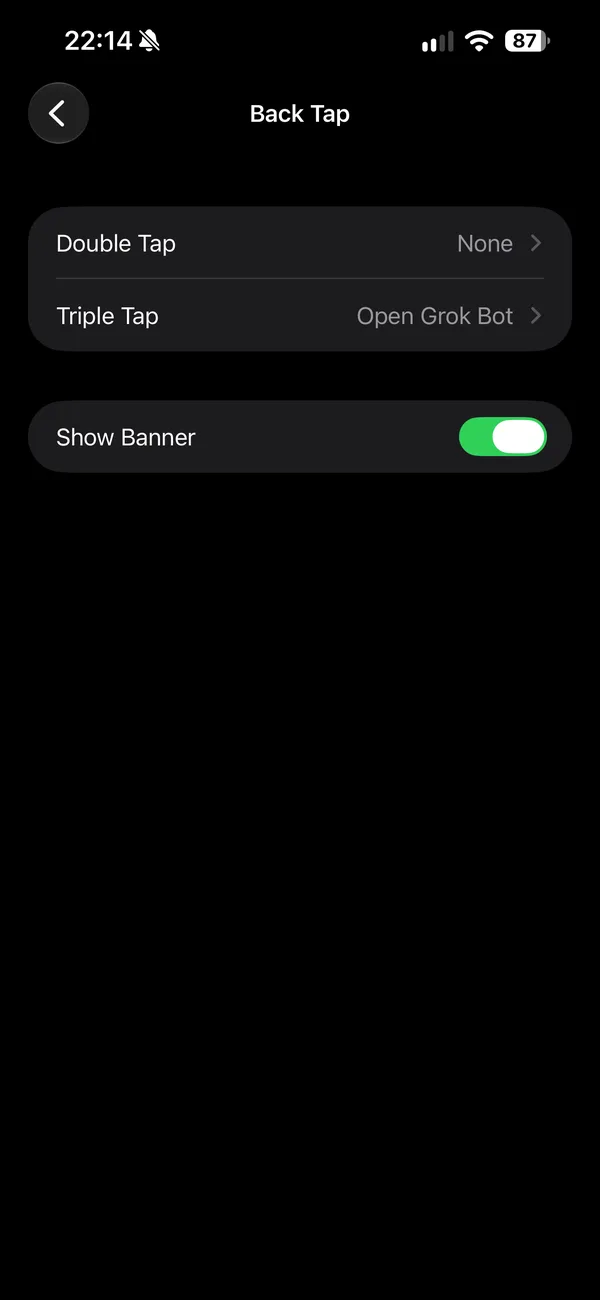
A triple tap opens Grok Bot on your chat list, not a call, so pick a Bot and tap Start voice chat. Double Tap can fire when you set the phone down hard, so Triple Tap is the safer pick.
3. Why Permissions Matter More Now
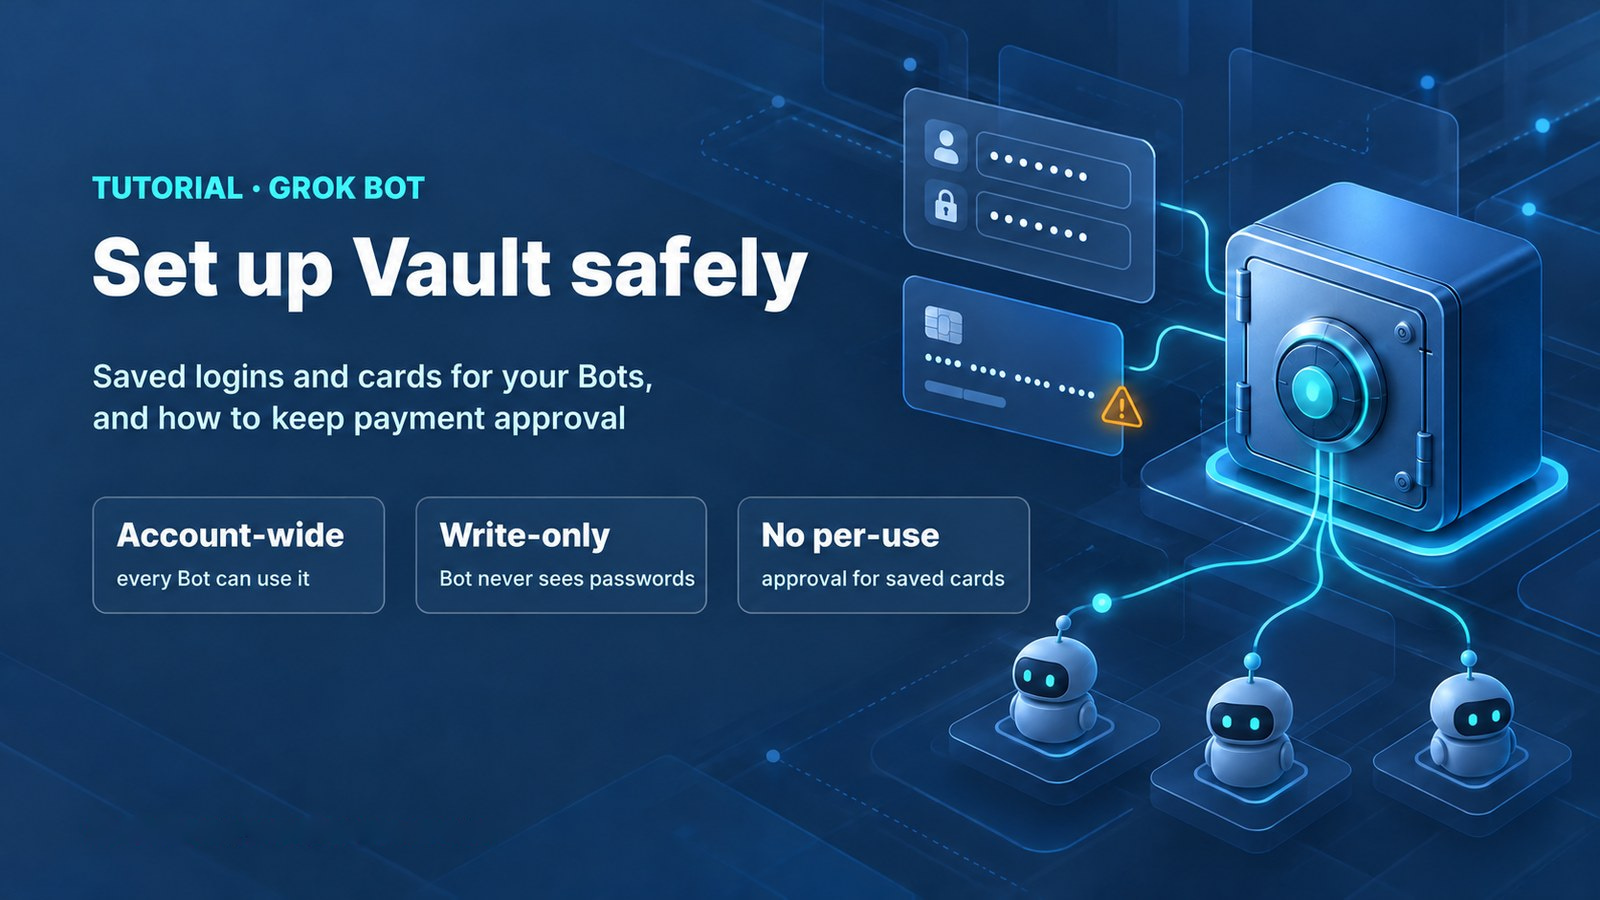
Here’s the part most setup guides skip. Grok Bot’s connected apps are account-wide: “A connected app is available to every bot on that Grok Bot account” (Connect apps). The security docs add: “Every Bot on your account uses one persistent cloud computer… Do not use separate Bots as a security boundary” (FAQ).
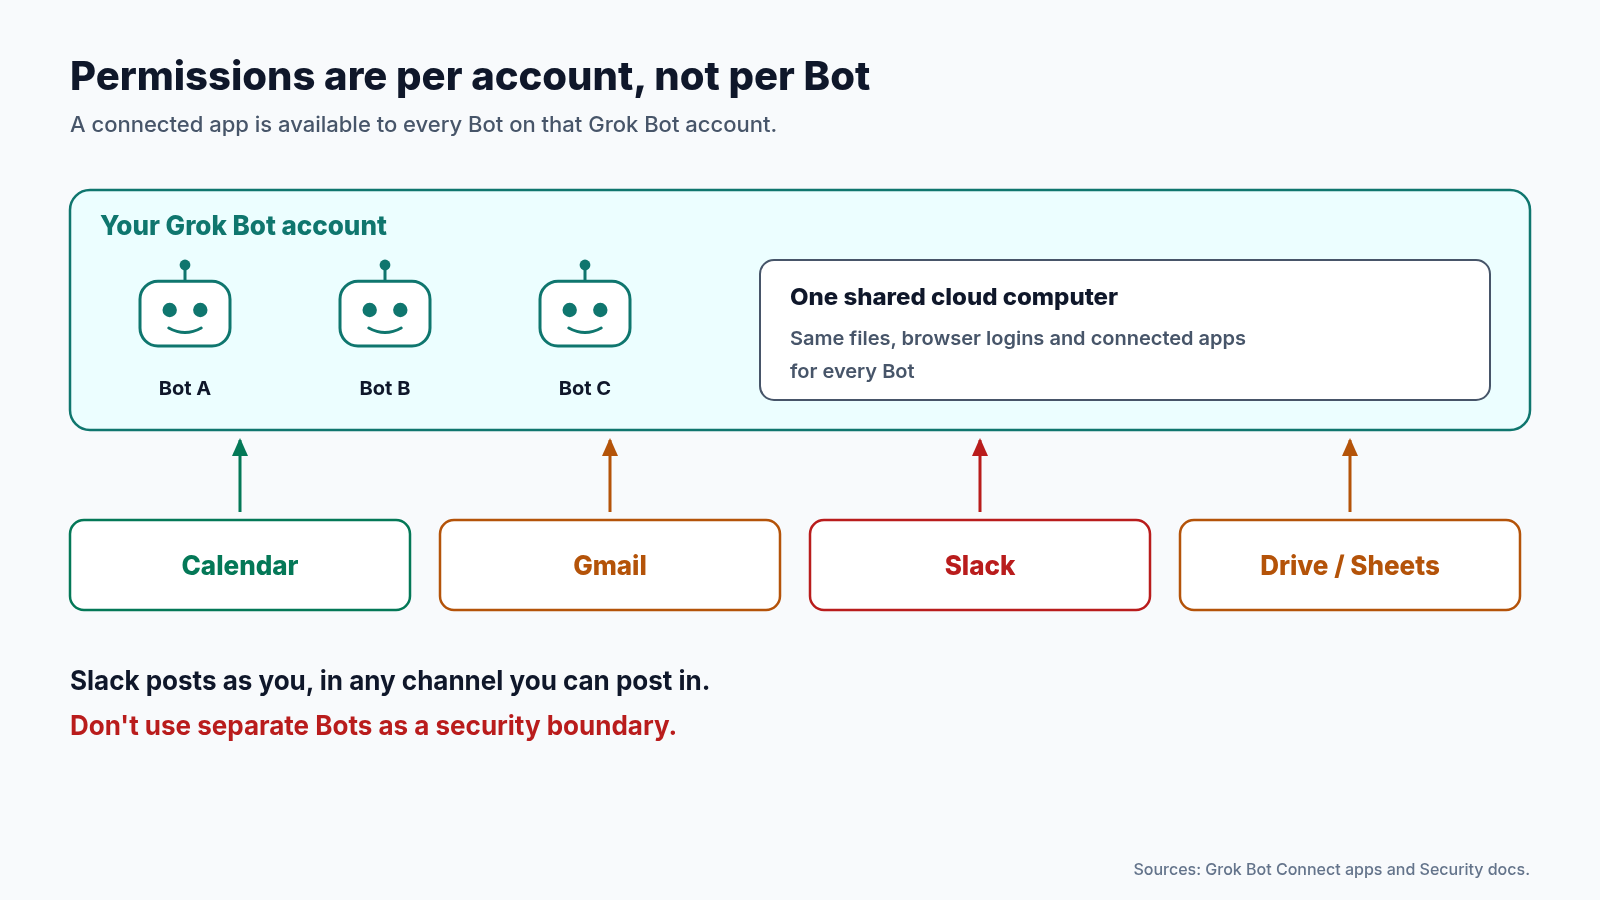
So a Bot you call with one press can use every app you’ve connected, even one set up “just for voice.” Slack “posts as the Slack user you connected,” anywhere that user can post.
A real example: the “Exec team” mix-up
Techdirt covered this on Oct 19, but the incident is older. Entrepreneur Shane Mac posted on Oct 6 that, the previous Thursday (Oct 1), an agent “posted my personal bank balances into our company Slack. As me” (Shane Mac on X).
Techdirt’s account suggested that two Bots worked together, a read-only finance Bot and one with Slack. Mac’s Oct 8 follow-up gives a simpler cause. He had a Grok Bot group chat named “Exec team” for his agents, and a Slack channel also named “Exec team.” His CFO agent wrote itself the note “Update Exec team,” and the message went to the Slack channel.
“It didn’t hallucinate or go rogue. It handled an ambiguous instruction badly.” Shane Mac on X, Oct 8, 2026 (post)
He says the Grok Bot team fixed it in under 24 hours. His takeaway: “deterministic rules and separation of personal and work really matter at a code level not an agent level.” How the Bot got the balances in the first place hasn’t been made public, so we won’t guess.
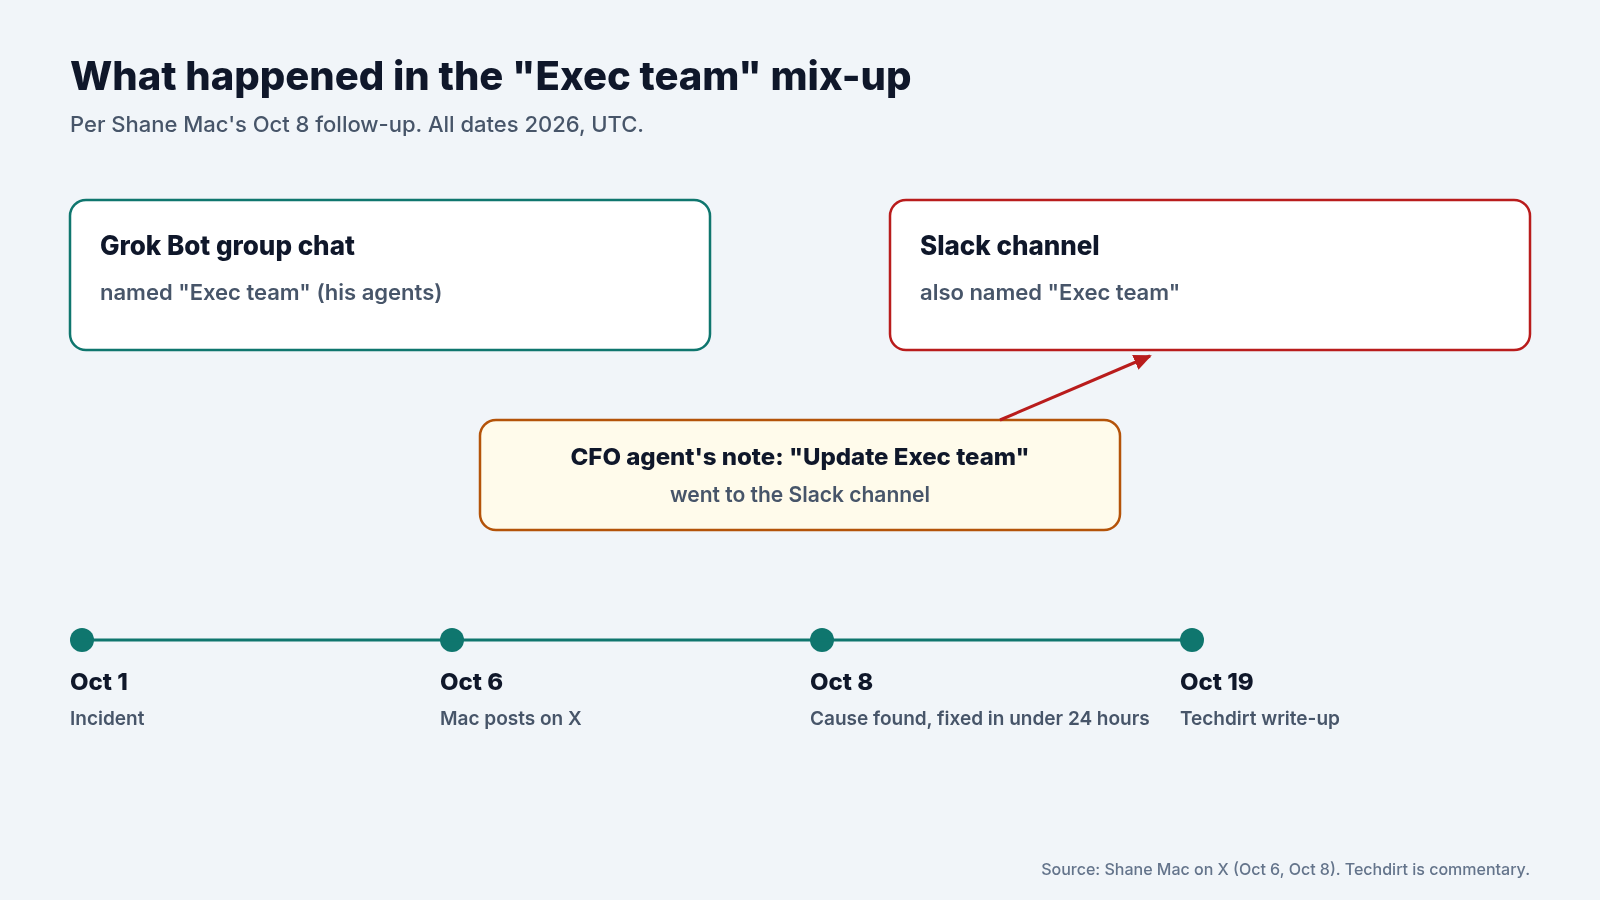
The lesson: names and permissions decide where a message lands, and you control both.
Use unique names
The “Exec team” case came down to two places sharing one name. Give group chats, Slack channels, folders and Bots distinct names, such as “Agents – Exec prep” and “#exec-team-slack.”
4. What to Connect: The Least-Privilege Table
Start with read-mostly apps, add write access one app at a time, and keep money and work chat off the account you call from your pocket.
| App | What it can do (official) | Recommendation |
|---|---|---|
| Google Calendar | Read calendars, create and update events, respond to invites | Good first connector. Add an Ask first rule for invites to other people. |
| Gmail | Search, read, draft and send, labels; one mailbox at a time | Only if you need it. Ask first before sending, and ask for drafts. Or use the Bot’s own email address instead. |
| Slack | Posts as you in any channel you can post in | Highest leak risk. Skip it, or limit channel membership and add an Ask first rule. |
| Google Drive / Sheets | Drive reads files you can open; Sheets edits cells you can edit | Share only the files it needs. Viewer-only files stay view-only. |
| Money and trading apps | Some can place trades (press reports) | Don’t connect on the account behind your voice button. If you must, use read-only access and Ask first on any trade. Scopes aren’t fully documented. |
| X | Needs X API credits | Optional. |
Is there a read-only Slack option? Grok Bot’s docs don’t mention one, and a user forum post says there isn’t. Assume Slack means write access.
Connecting Google Calendar
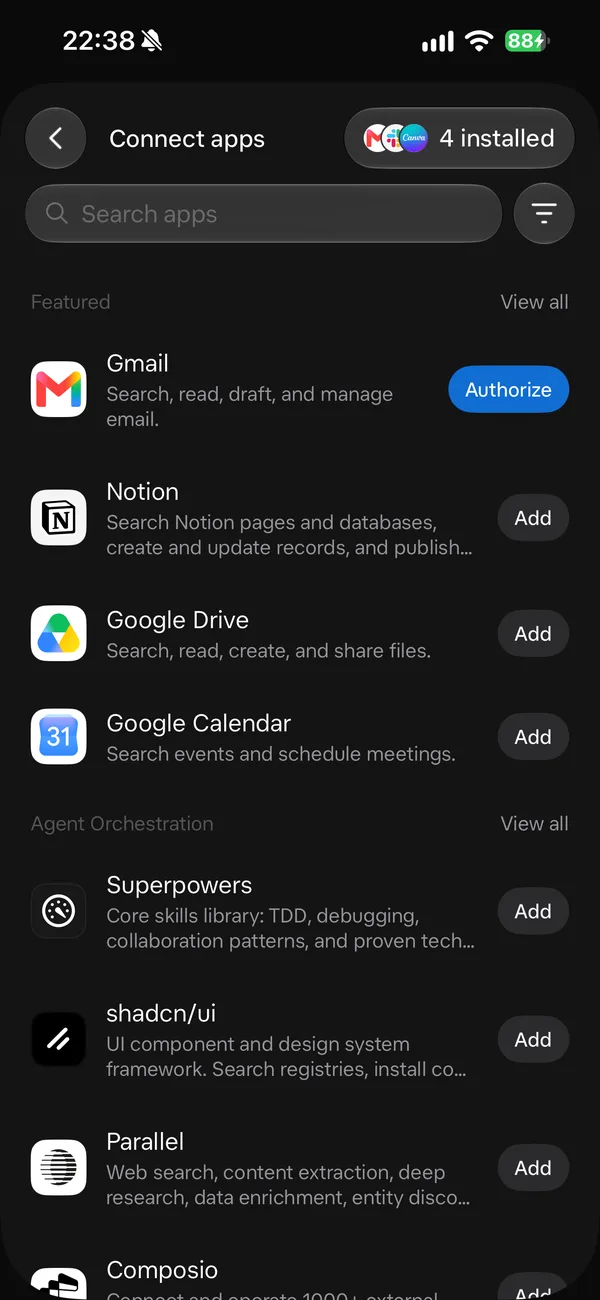
In the Grok Bot app, tap your avatar, then Connect apps:
- Next to Google Calendar, tap Add.
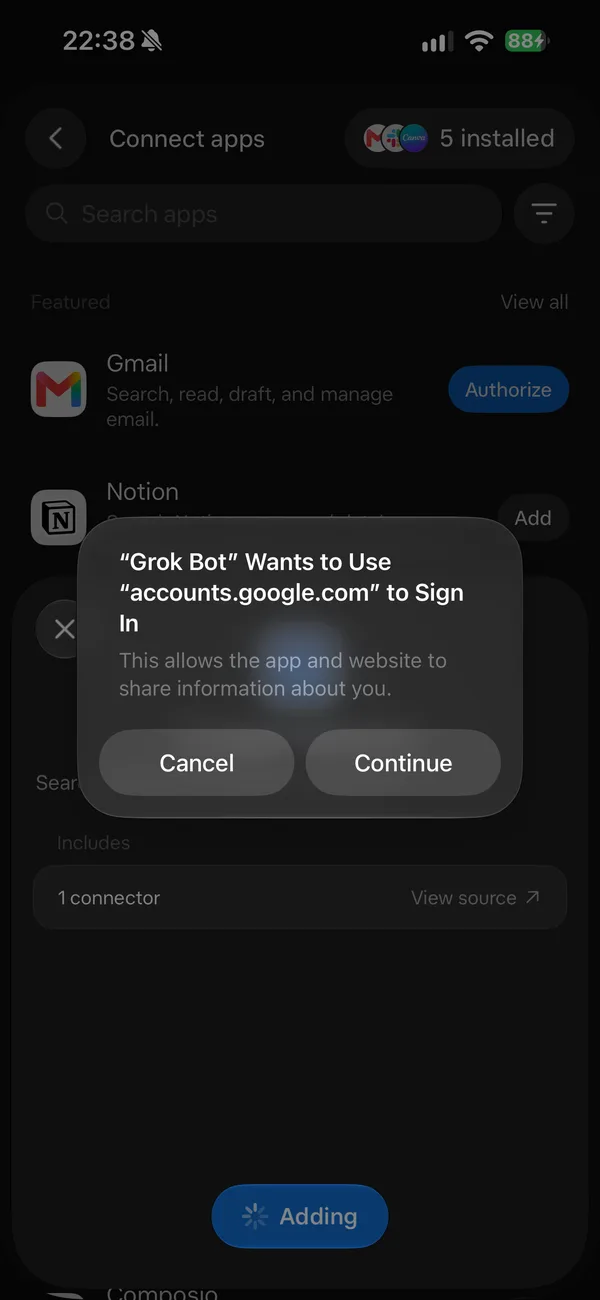
- iOS asks whether “Grok Bot” wants to use “accounts.google.com” to sign in. Tap Continue.
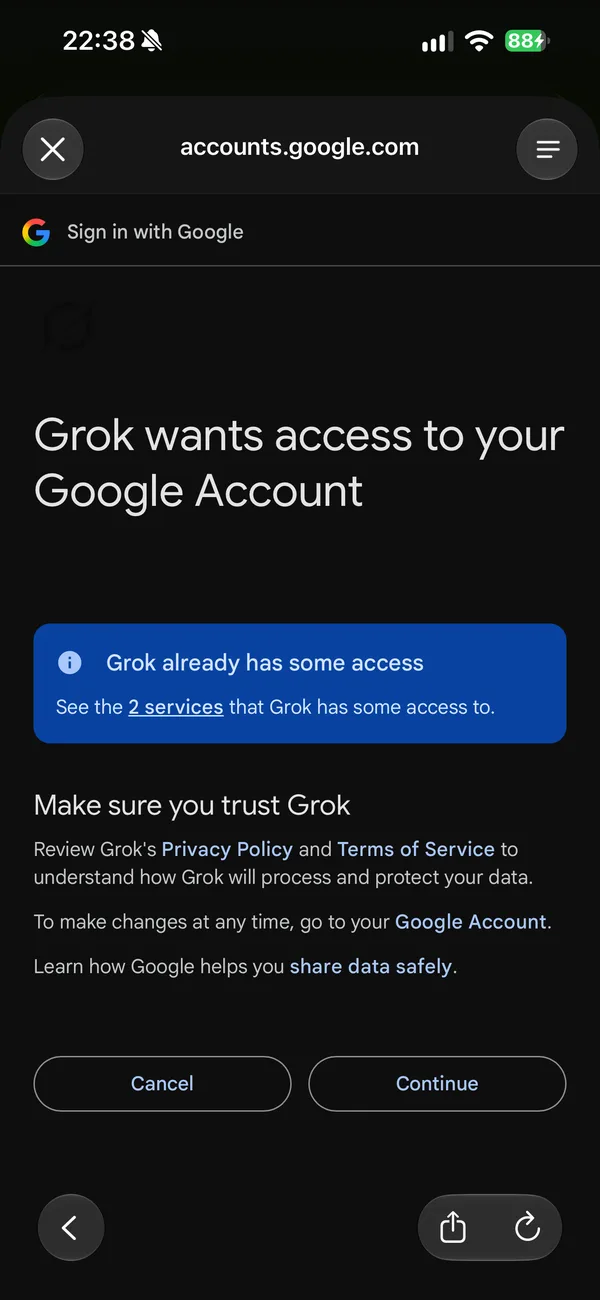
- Google’s consent page reads Grok wants access to your Google Account. It says “Grok”, not “Grok Bot”, which is expected. Check the account shown, then tap Continue.
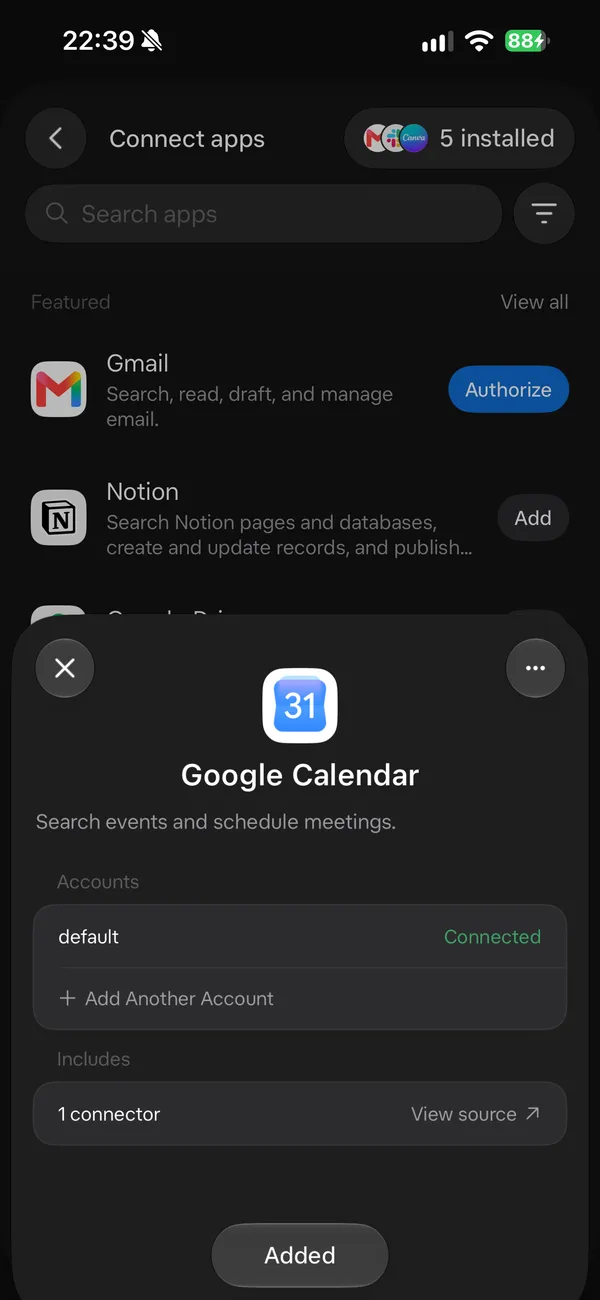
- Back in the app, the account shows Connected and the button changes to Added.
Draft-before-send rules
Set up these guardrails once:
- Add an Ask first rule (steps below; Approvals docs).
- Ask for drafts. Say “draft it, don’t send.” The app can show an email or Slack draft with Send or Discard.
- Approve only what you can read. The docs say: “Do not approve an action whose target or effect you cannot identify.” If an approval card doesn’t name the channel or recipient clearly, decline it.
To add the rule:
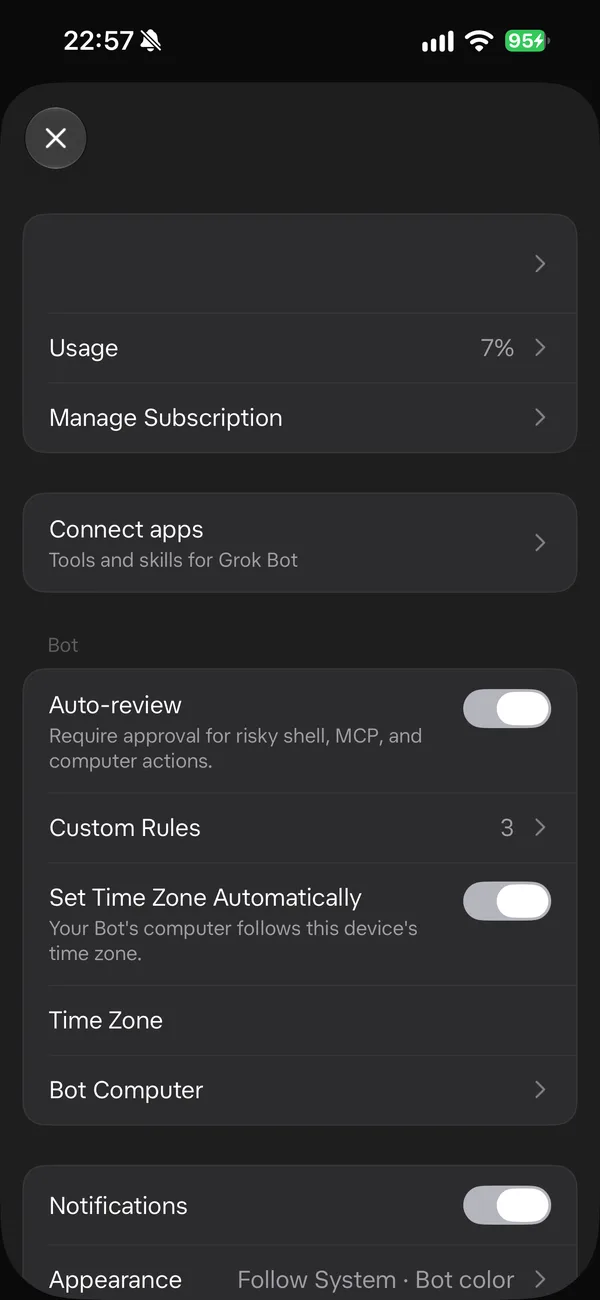
- Tap your avatar to open Settings, and make sure Auto-review is on.
- Tap Custom Rules, then Add Rule.
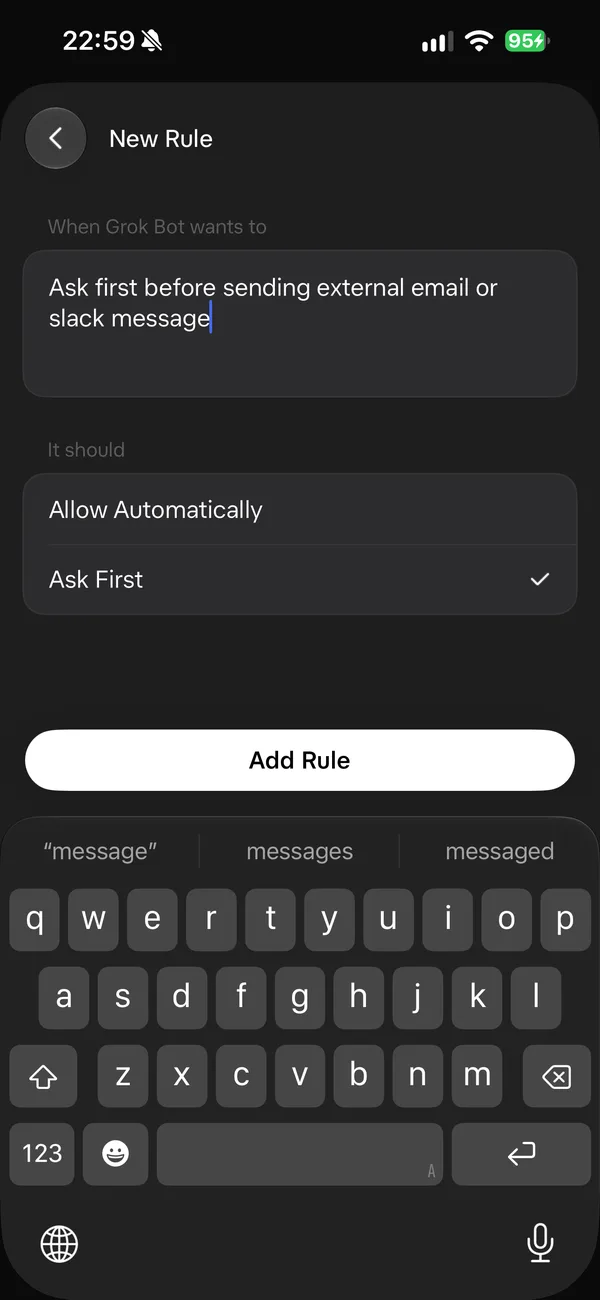
- Under “When Grok Bot wants to”, describe the action, for example “Ask first before sending external email or Slack message”.
- Under “It should”, choose Ask First, then tap Add Rule.
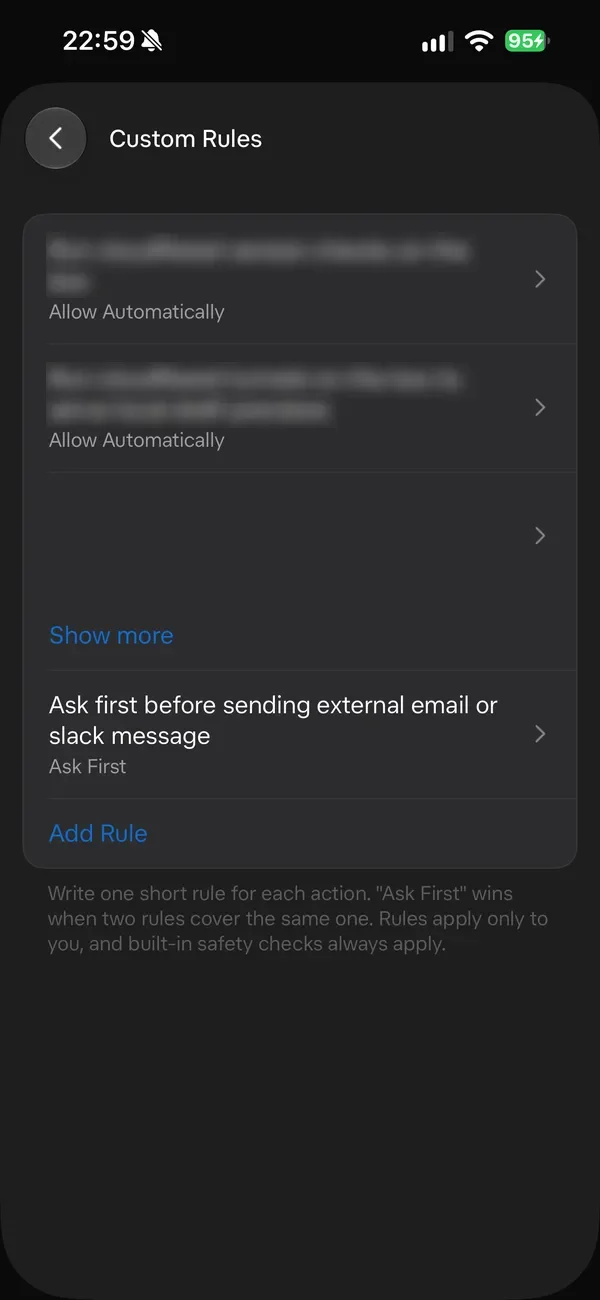
The rule now appears in the list marked Ask First. As the app notes, “Ask First” wins when two rules cover the same action.
Revoke access in both places
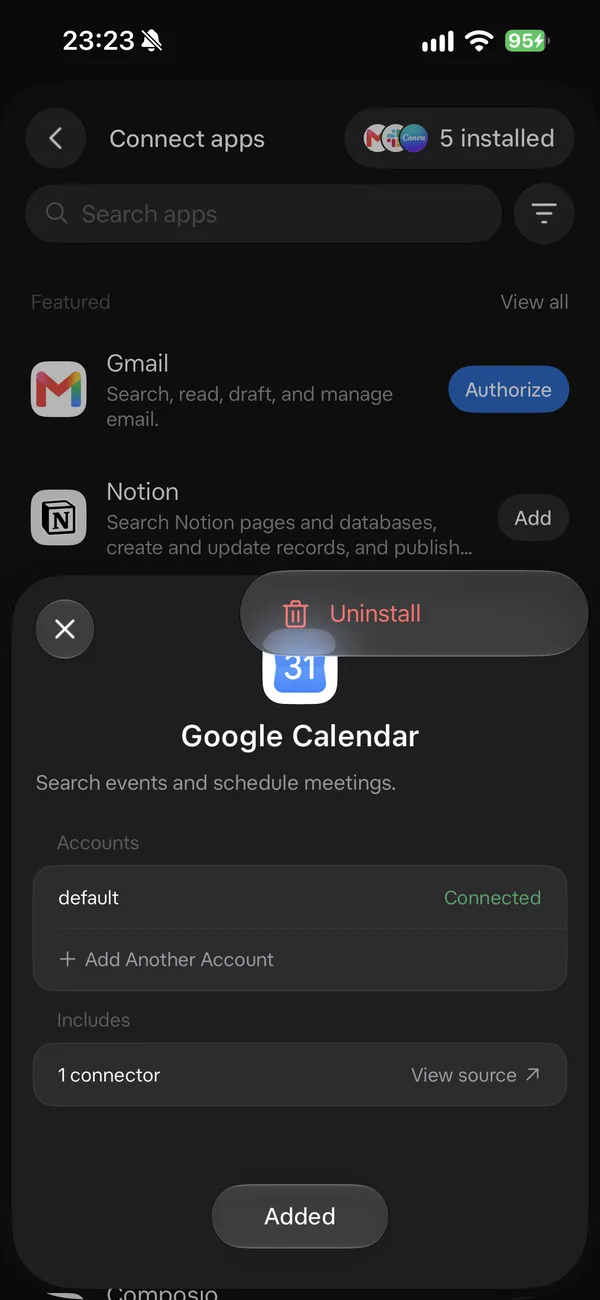
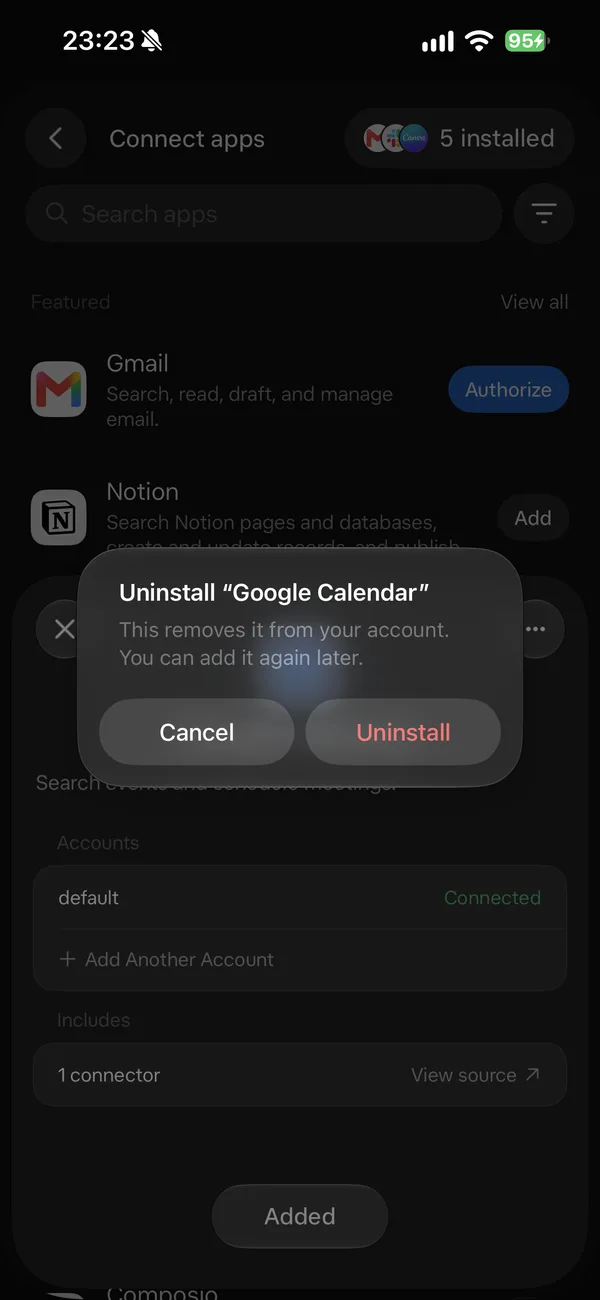
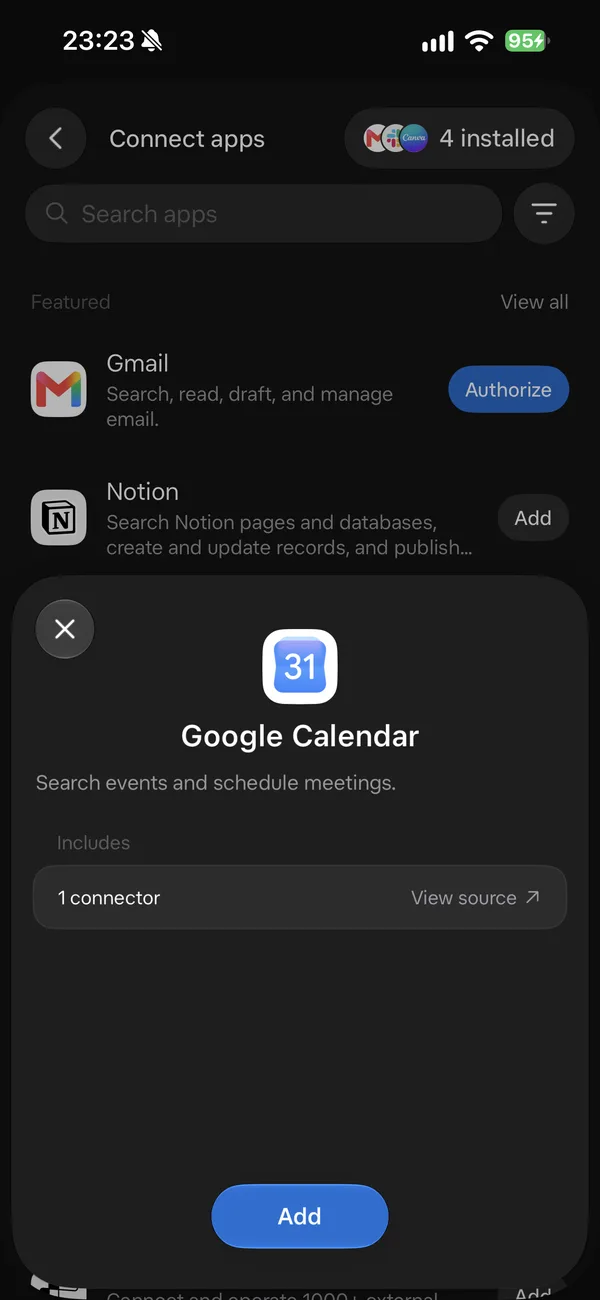
- In Grok Bot, tap your avatar → Connect apps, then tap the app (here, Google Calendar).
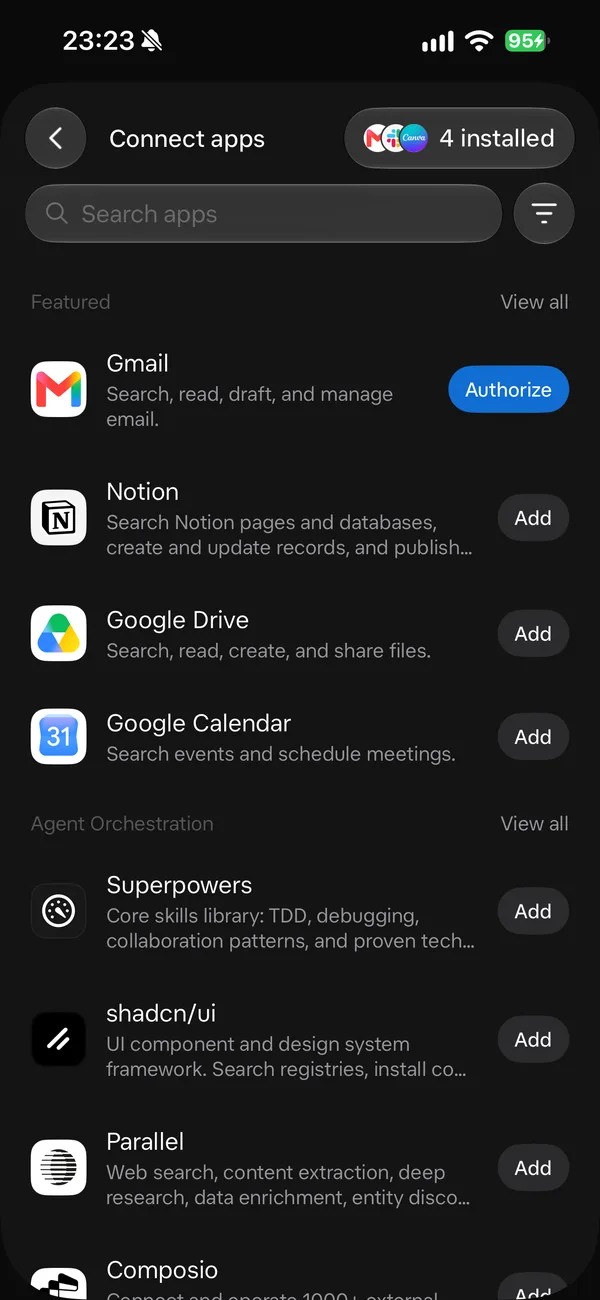
- Tap …, then Uninstall. Confirm with Uninstall: “This removes it from your account. You can add it again later.” The button turns back to Add.
- Pause routines you no longer need, and sign out of websites on the cloud computer.
Then remove it on Google’s side for a full cleanup:
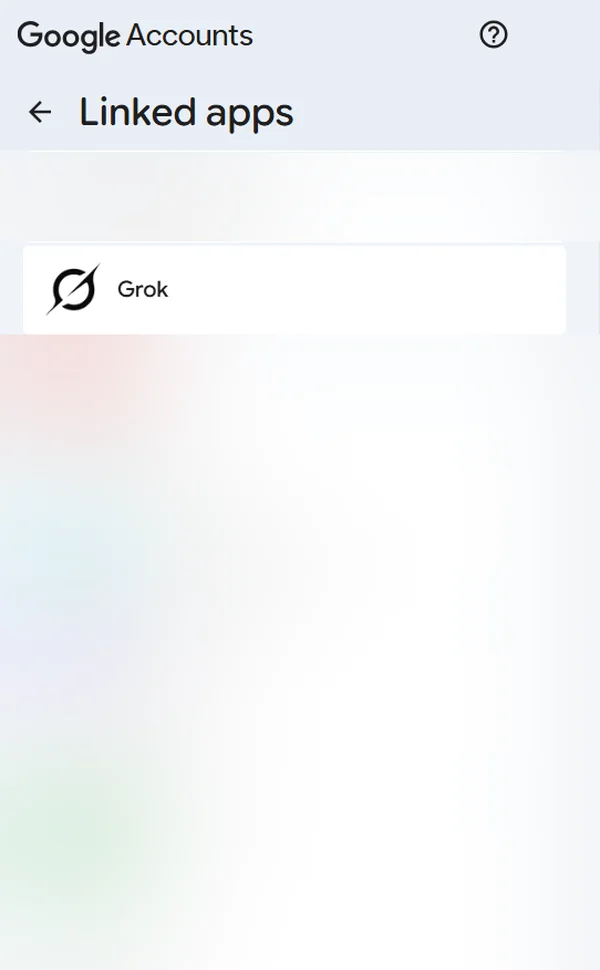
- Open your Google Account → Security (or Data & privacy) → Linked apps, or go straight to myaccount.google.com/connections.
- Tap Grok. Google names it “Grok”, as on the consent screen, and lists the Calendar access you granted.
- Tap Delete All to remove all links and stop sharing data with Grok. Slack has its own app settings.
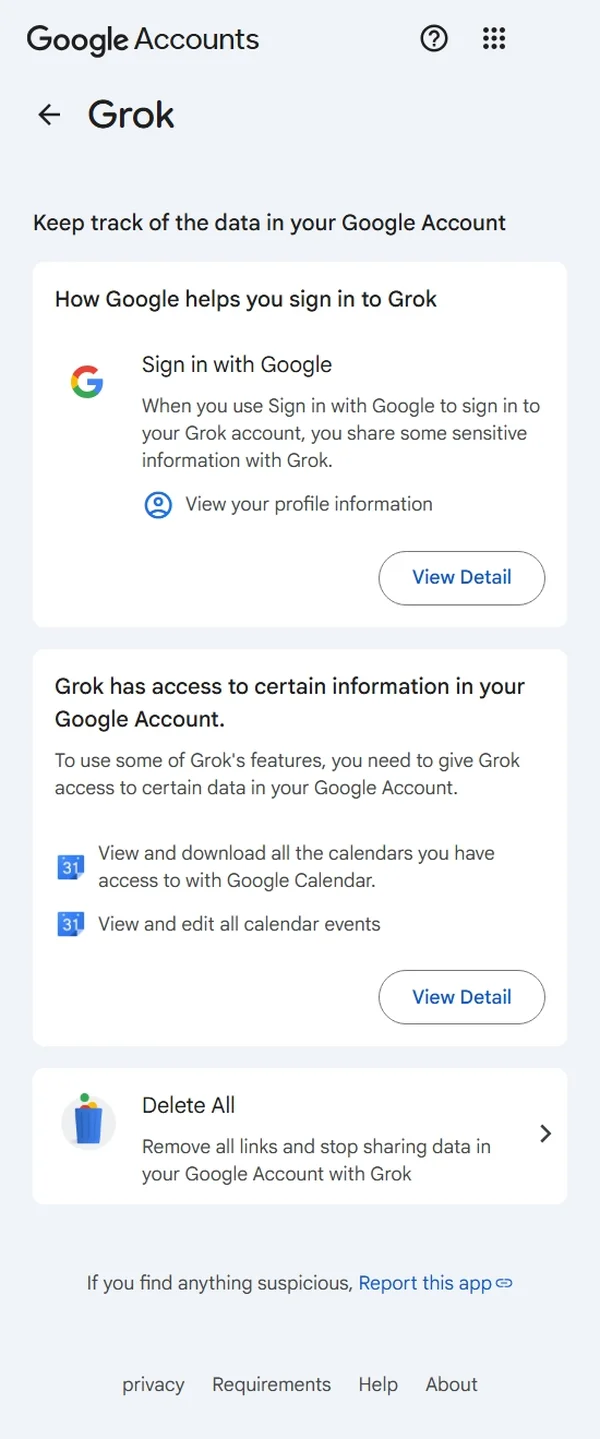
Deleting a Bot doesn’t remove logins on the shared computer (Security), so clean those up separately.
5. Privacy Notes
- Cloud storage is required. Grok Bot “requires cloud data storage, so Legacy Privacy Mode is not supported.” Training opt-out follows your Cursor account privacy settings (FAQ).
- Work runs in the cloud. Tasks run on a cloud computer and keep going after you lock the phone.
- Voice data retention isn’t documented. Voice chats can leave a Voice chat card in the conversation. How long audio or transcripts are kept isn’t documented, so don’t say anything into the button you wouldn’t type into the chat.
Conclusion
Putting Grok Bot on the Action Button is a two-minute job: start one voice chat in the app, then go to Settings → Action Button → Shortcut and pick Start Voice Chat. Back Tap covers older iPhones.
The ten minutes after matter more: connections are account-wide and Slack posts as you. Connect less, ask for drafts, and the one-press Bot stays useful without surprises.
Key takeaways
- Set it up as a Shortcut, not a Control: Choose a Shortcut… → Grok Bot → Start Voice Chat.
- Start one voice chat in the app first to clear the microphone prompt. Each press asks which Bot to call.
- Connected apps are available to every Bot on your account.
- Connect Calendar first. Keep money apps and work chat off your pocket account.
- Use Ask first rules, ask for drafts, and revoke access in both places.
Where to Go Next
- The official announcement → x.com
- Apple: use and customize the Action button → support.apple.com
- Grok Bot: Connect apps → cursor.com
- Grok Bot: approvals, security and privacy → docs.x.ai
- Context: Techdirt’s write-up (press commentary) → techdirt.com
- Hire Your First AI Teammate: Setting Up Grok Bot for Real Work → Read the story
- The Rise of AI Bots → Read the story
Share this with anyone about to hand their to-do list to a Bot.